Asset
Last Updated: December 30, 2025
Document Version: 1.0
Prepared for: Emgage HRMS Implementation Team
The Asset List & Asset Creation module allows administrators to create, manage, allocate, and track assets across the organization.
Assets can be added using Manual Entry, Bulk Import, or Auto-Generated IDs, enabling organizations to maintain structured and auditable inventory records for IT hardware, office equipment, accessories, and consumables.
This module also supports allocation workflow, custom properties, document attachments, history tracking, search filters, and export reporting tools.
System Overview
The module consists of the following key components:
- Asset List Table – Displays all registered assets and their allocation status
- Toolbar Controls – Add Asset, Import Asset, Export data, and Apply Filters
- Add Asset (Manual Entry) – Create an asset using form inputs
- Add Asset (Import Mode) – Bulk upload assets via Excel / CSV
- Add Asset (Auto Mode) – Auto-generate Asset IDs and Units
- Allocate Asset – Assign an asset to an employee
- Edit Asset – Modify existing records and custom properties
- Asset Details View – Read-only information view
- Asset History – Track updates, edits, and allocation changes
- Document History – View uploaded attachments and logs
- Filter Panel – Advanced search and record filtering
- Export Options – Download asset data in multiple formats
Asset List Table
The Asset List Table provides an overview of all configured assets and their current lifecycle state.
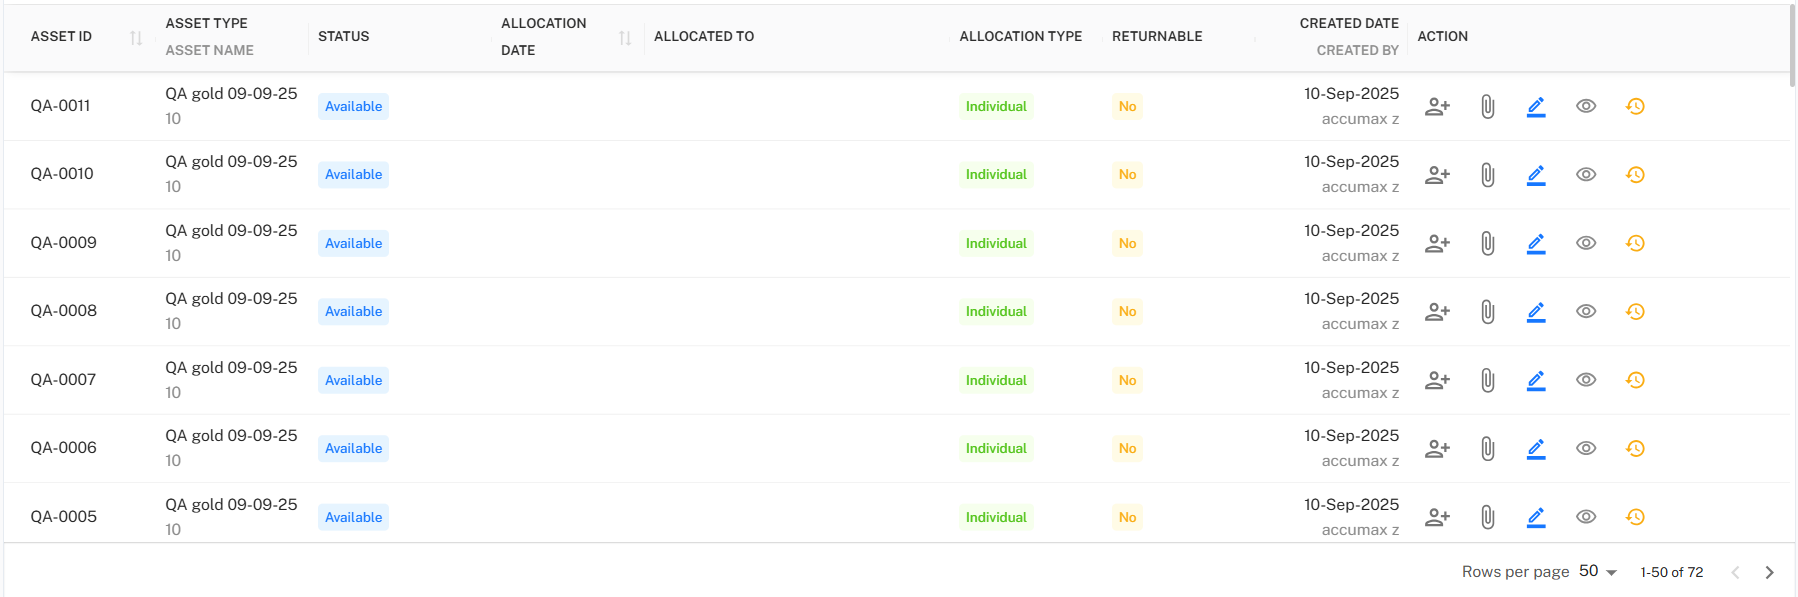
Table Columns
| Column | Description |
|---|---|
| Asset ID | Unique asset reference number |
| Asset Name | Label / name assigned to the asset |
| Asset Type | Asset category (Laptop, Keyboard, Furniture, etc.) |
| Status | Indicates whether the asset is Available, Allocated, or Inactive |
| Allocation Date | Date the asset was assigned |
| Allocated To | Employee who currently holds the asset |
| Allocation Type | Individual / Shared / Department-Wise |
| Returnable | Indicates whether asset must be returned on exit or reassignment |
| Created Date | Date when the asset was created in the system |
| Created By | User who registered the asset |
| Actions | Options to View, Edit, Allocate, Upload Documents, View History, etc. |
Toolbar Controls
Located above the asset table, the toolbar provides operational and data-management actions.

Toolbar Options
- + Asset → Opens the Add Asset dialog
- Import Asset → Upload bulk assets using Excel / CSV template
- Export → Download the current table data
- Filter → Refine records using advanced filters
Export Options

The Export option allows administrators to download the currently visible asset data.
Supported Export Formats
| Format | Purpose |
|---|---|
| CSV | Lightweight data format for integrations and bulk operations |
| Excel | Reporting, audits, and spreadsheet-based analysis |
| Static format for review, sign-off, and sharing |
Note: Export downloads only the filtered table data currently displayed.
Add Asset — Overview
Selecting + Asset opens the asset creation interface, featuring three different creation modes.

Available Creation Modes
- Manual — Create a single asset record through form inputs
- Import — Upload multiple assets using a structured data template
- Auto — Automatically generate Asset IDs and manage asset units
Each mode supports:
- Core asset master data
- Vendor & warranty details
- Custom properties
- Attachments & supporting documents
- Returnable status flag
Add Asset — Manual Mode
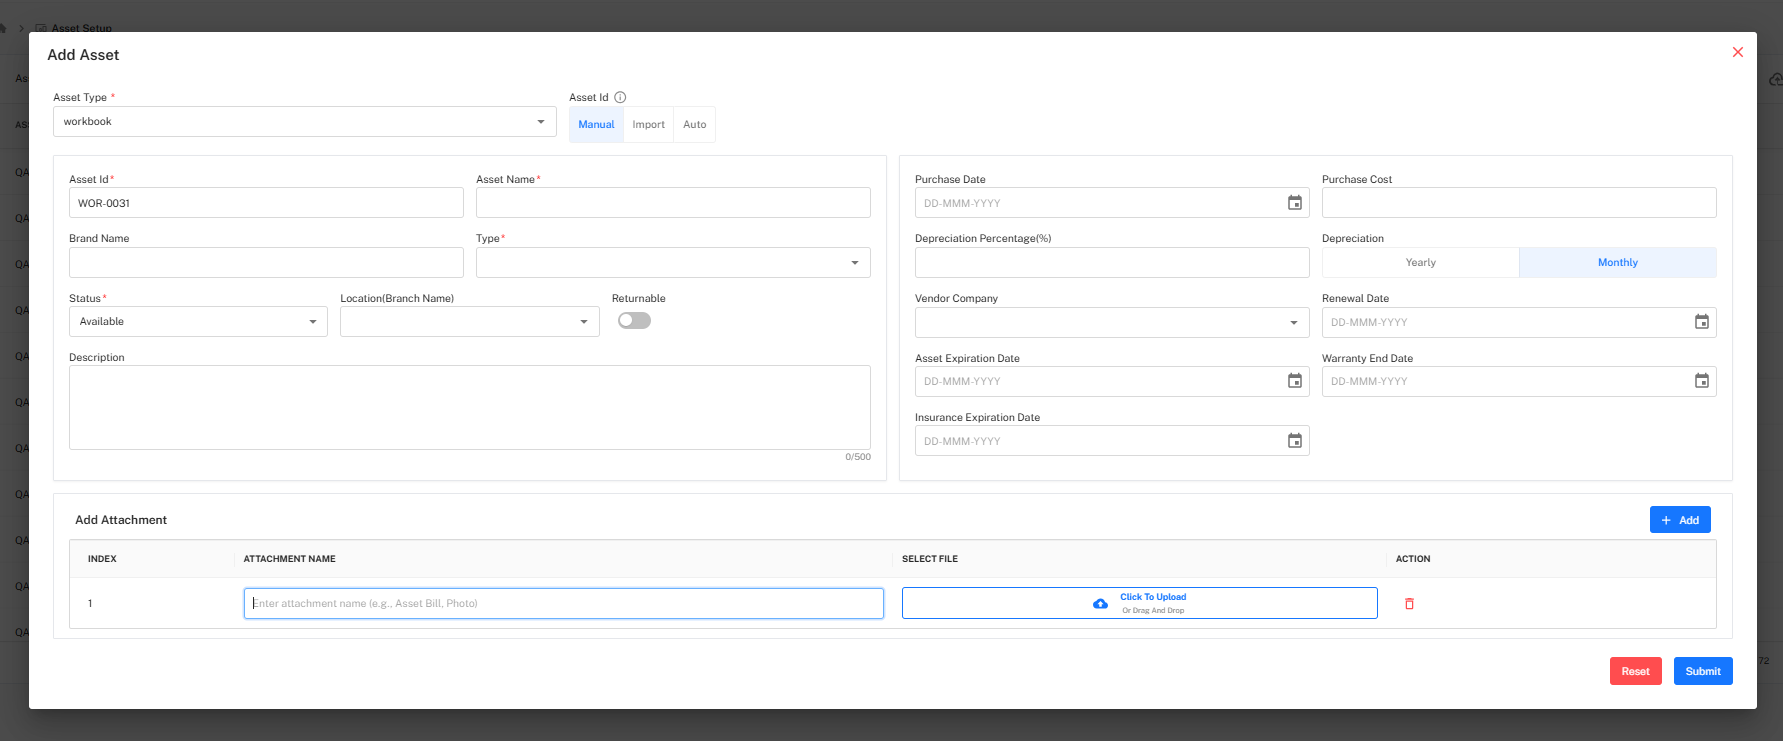
Used when administrators need to add one specific asset at a time.
Mandatory Fields
| Field | Description |
|---|---|
| Asset Type | Select asset category |
| Asset ID | Manually entered unique identifier |
| Asset Name | Item name / serial name |
| Type | Defines allocation type (Individual / Shared) |
| Status | Initial availability condition |
Additional Fields
- Brand Name
- Location / Branch
- Returnable toggle
- Purchase Cost & Purchase Date
- Vendor Company
- Depreciation mode (Yearly / Monthly)
- Warranty & Expiration Dates
- Description field (Max 500 characters)
Attachment Section

Multiple documents may be uploaded such as:
- Purchase bills
- Warranty cards
- Serial photos
- Insurance records
Add Asset — Import Mode (Bulk Upload)
The Import mode allows uploading multiple assets through an Excel / CSV template.
Import Workflow
- Select Asset Type
- Download the Sample Template
- Upload the filled file
- Validate uploaded data
- Confirm and finalize import
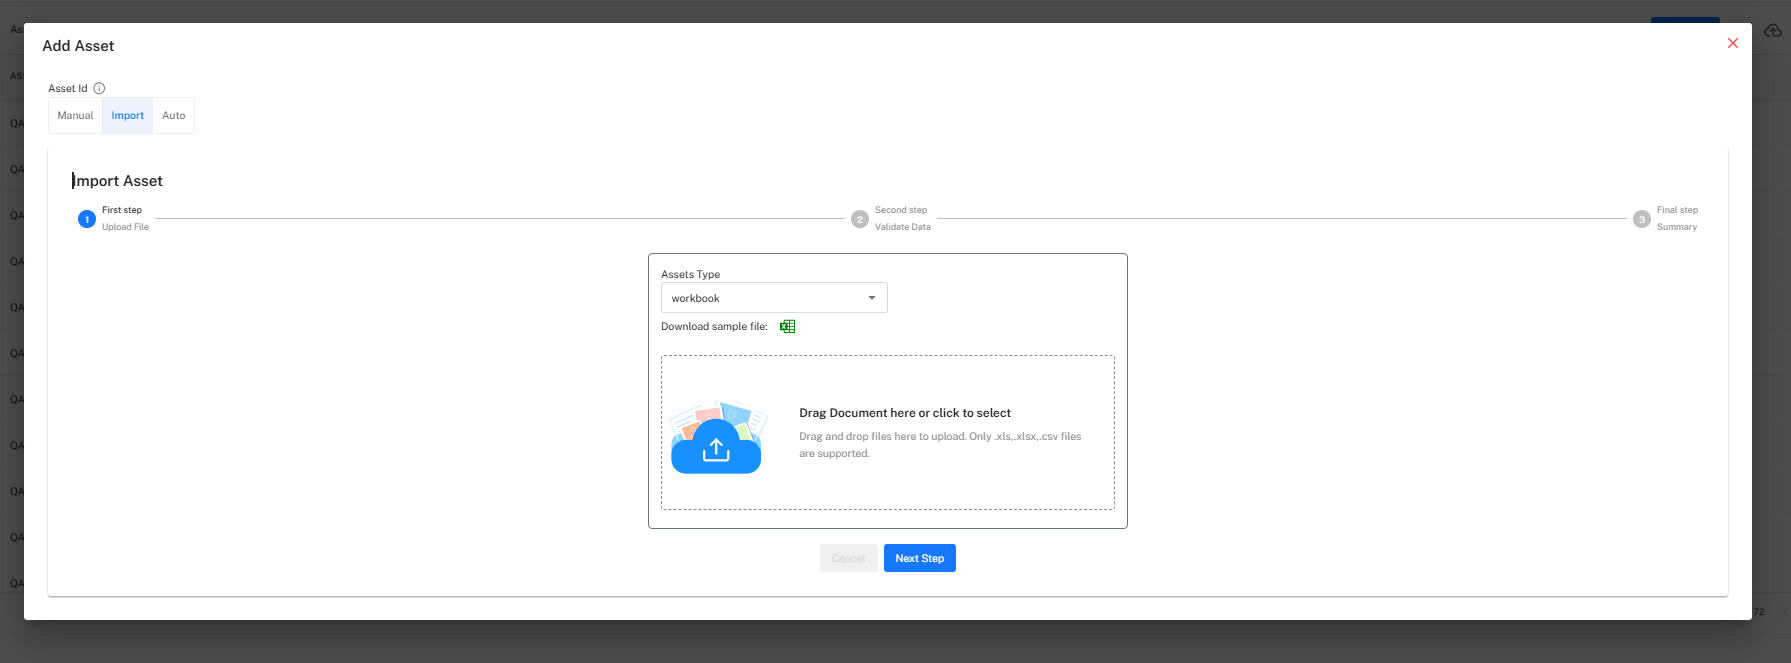
Data Validations Performed
- Duplicate Asset IDs
- Blank mandatory fields
- Invalid date or number formats
- Mismatched asset type values
Add Asset — Auto Mode
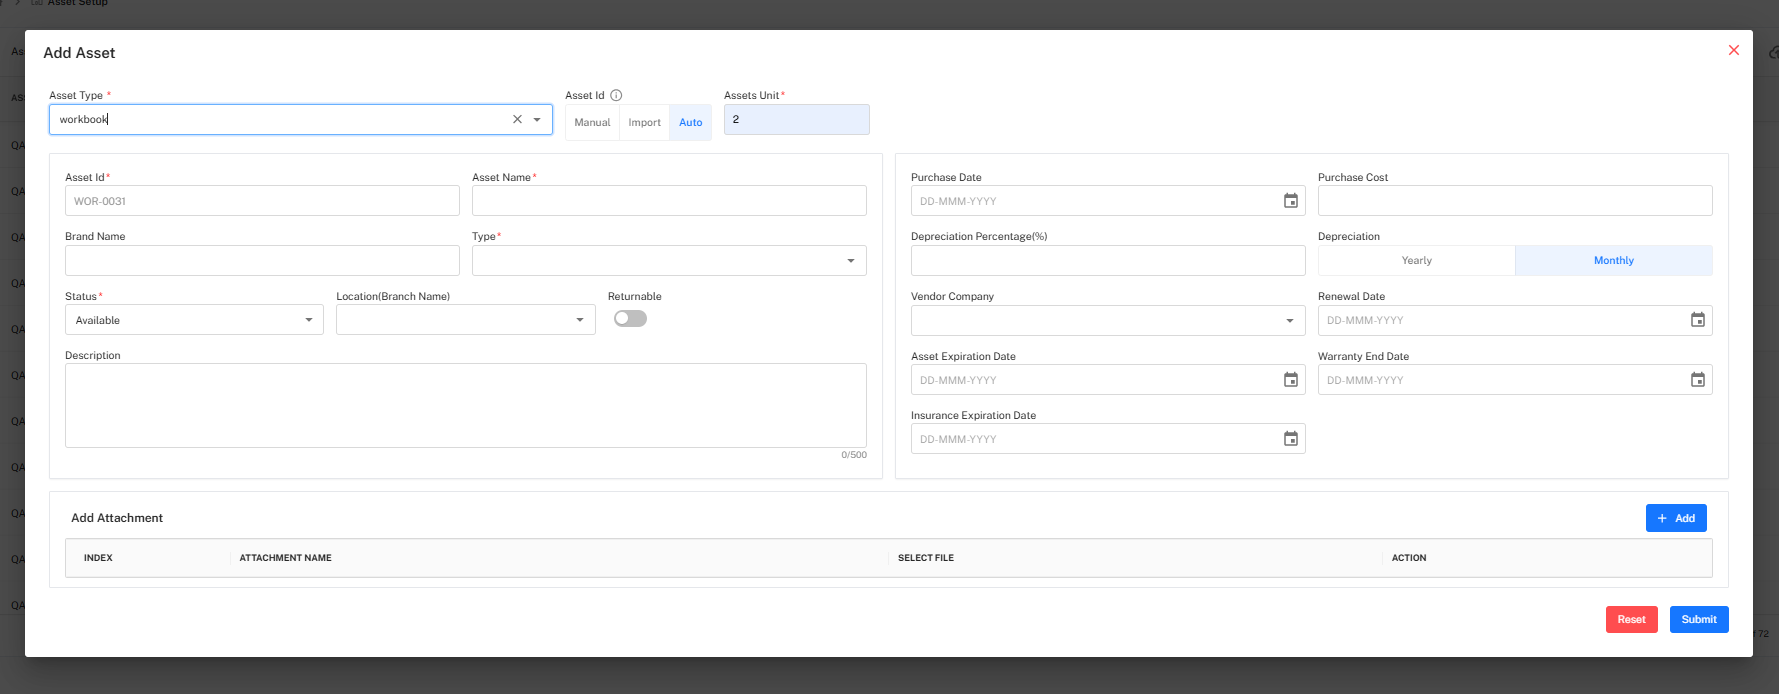
In Auto Mode, the system:
- Automatically generates sequential Asset IDs
- Uses Asset Units to create multiple instances quickly
This mode is ideal for:
- Consumables
- Bulk hardware stock
- Identical asset series
All other form fields behave the same as Manual Mode.
Allocate Asset
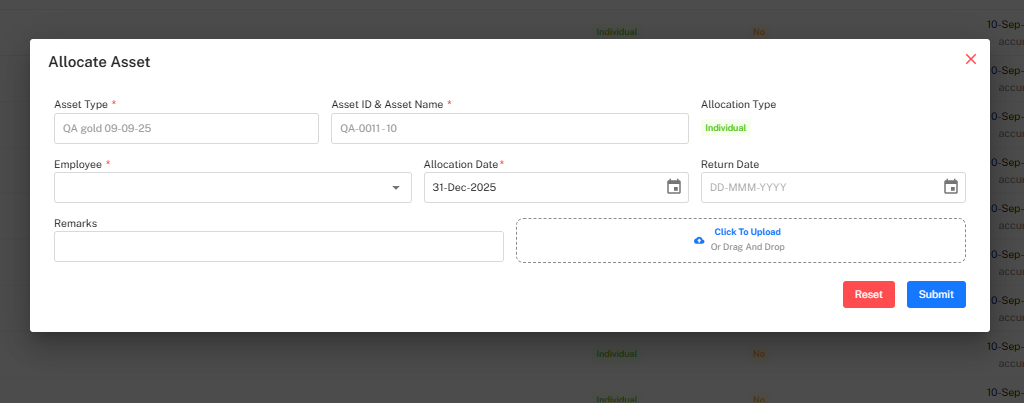
This function is used to assign an existing asset to an employee.
Mandatory Fields
| Field | Description |
|---|---|
| Employee | Employee receiving the asset |
| Allocation Date | Date when allocation becomes effective |
| Asset Type | Linked asset type |
| Asset ID & Name | Selected asset record |
Optional fields include:
- Return Date
- Remarks
- Supporting document upload
Edit Asset
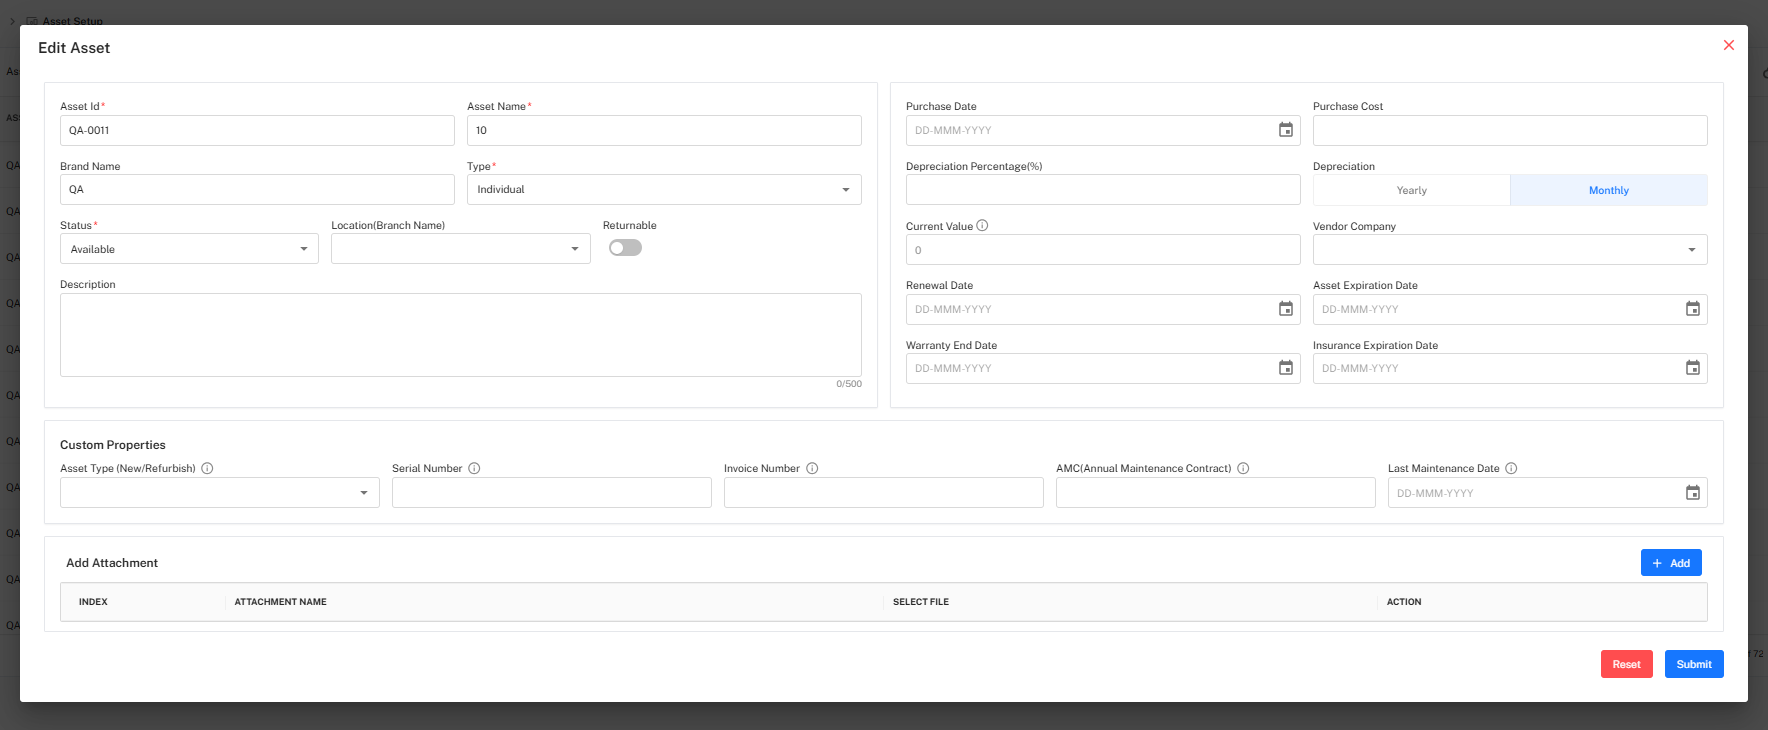
Used to update details of an existing asset, including:
- Status and branch information
- Expiry & warranty metadata
- Custom property values
- Attachments
- Returnable configuration
- General master attributes
Asset Details View
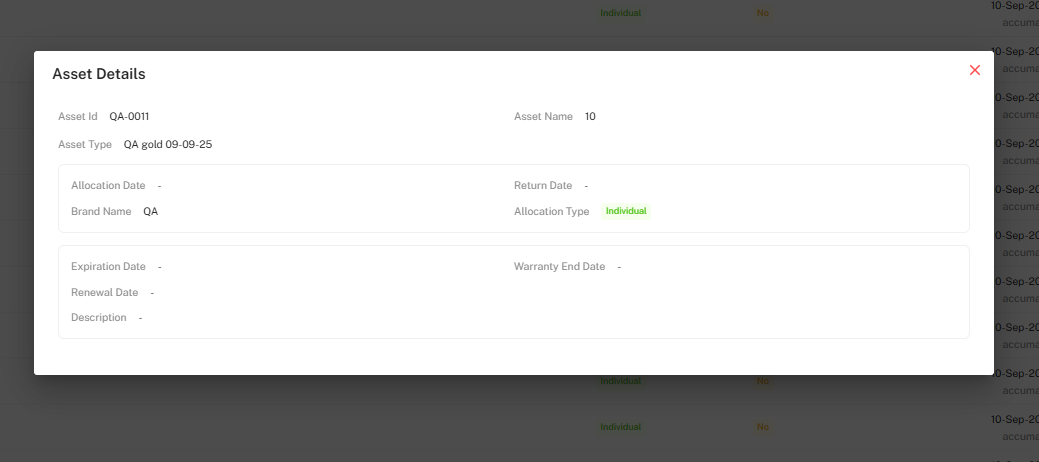
Displays read-only asset information such as:
- Asset ID, Type, and Name
- Brand Name
- Allocation Type
- Expiration & Warranty dates
- Description details
Asset History
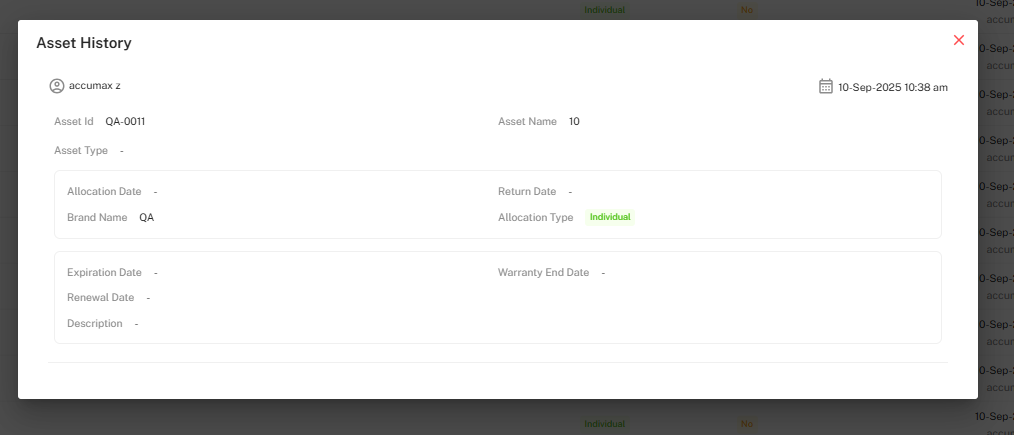
Maintains a chronological record of asset changes:
- Updated By & Timestamp
- Allocation updates
- Edited values and modifications
- Notes & remarks
This feature supports audit transparency and governance.
Document History
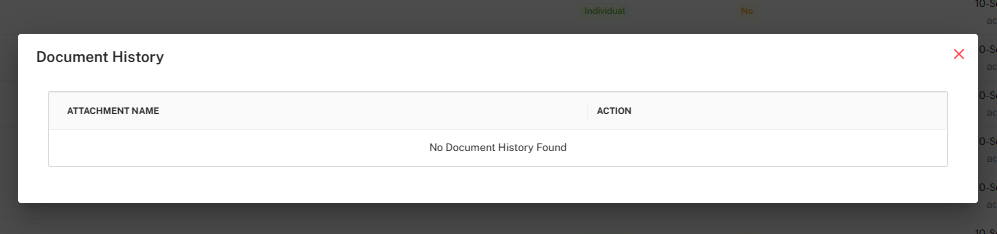
Shows the list of documents uploaded against the asset.
If no attachments exist, the system displays:
No Document History Found
Filter Panel
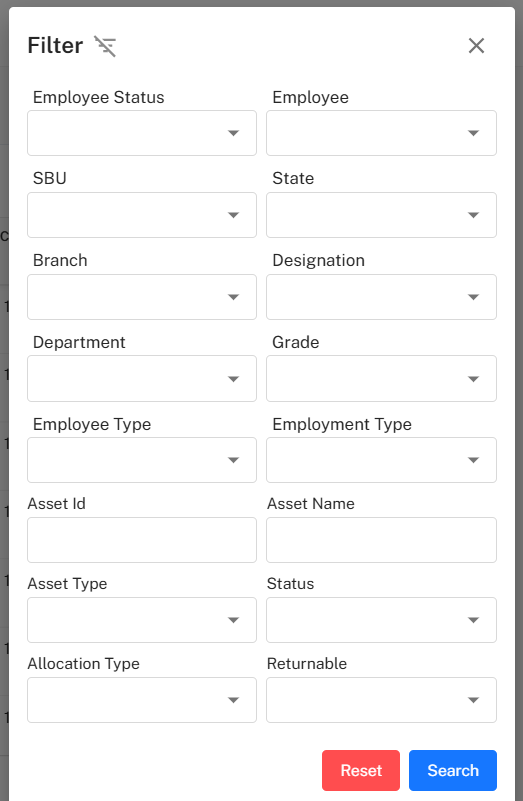
The Filter Panel provides advanced search capabilities across employee and asset attributes.
Available Filters
- Employee Status / Employee
- Department / SBU / Grade
- Branch / State / Designation
- Asset ID / Asset Name / Asset Type
- Status
- Allocation Type
- Returnable Flag
- Employment & Employee Type
Filter Actions
- Search → Apply selected filters
- Reset → Clear all filters
Implementation Guidelines
For Asset Administrators
- Use Import Mode or Auto Mode to manage bulk entries
- Maintain unique Asset ID conventions
- Ensure warranty & purchase files are uploaded
- Keep allocation status updated in real time
For Managers
- Validate assigned assets before confirmation
- Use allocation return date for tracking handovers
- Refer to History & Document logs during audits
Common Issues & Solutions
| Issue | Possible Cause | Resolution |
|---|---|---|
| Duplicate Asset ID | ID already exists in system | Modify or regenerate Asset ID |
| Asset not showing in list | Filters active | Reset or clear filters |
| Allocation not visible | Asset never assigned | Allocate asset first |
| Import upload failure | Wrong template or field mismatch | Re-download sample format |
Best Practices
- Follow consistent Asset ID naming standards
- Attach supporting documentation for every asset
- Review Asset History before performing edits
- Regularly export reports for audit & compliance
- Track returnable assets during employee exit