My Assets
Last Updated: January 2026
📋 Overview
The My Assets module allows employees to manage company-allocated resources. Through this interface, users can view their currently allocated assets, request new assets, view detailed specifications, and initiate return requests.
To access this module, navigate to Asset → My Asset in the sidebar menu.
🖥️ My Assets Dashboard
The main dashboard displays a list of all assets currently allocated to the employee.
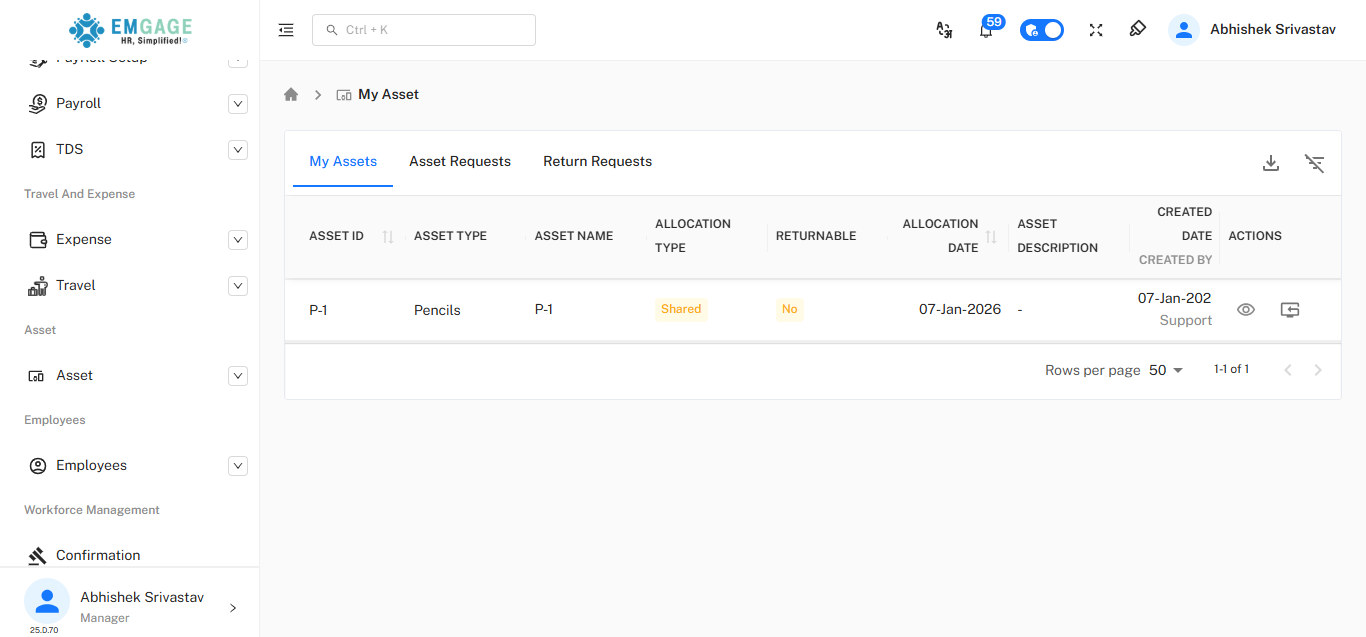
Key Features
- Asset List: Displays Asset ID, Type, Name, Allocation Type (e.g., Shared), and Allocation Date.
- Tabs:
- My Assets: View currently held assets.
- Asset Requests: Track status of new asset requests.
- Return Requests: Track status of assets submitted for return.
- Actions:
- View Details (Eye Icon): See comprehensive details about the asset.
- Return Asset (Return Icon): Initiate the return process for a specific asset.
🚀 Requesting a New Asset
Employees can request new assets directly from the portal.
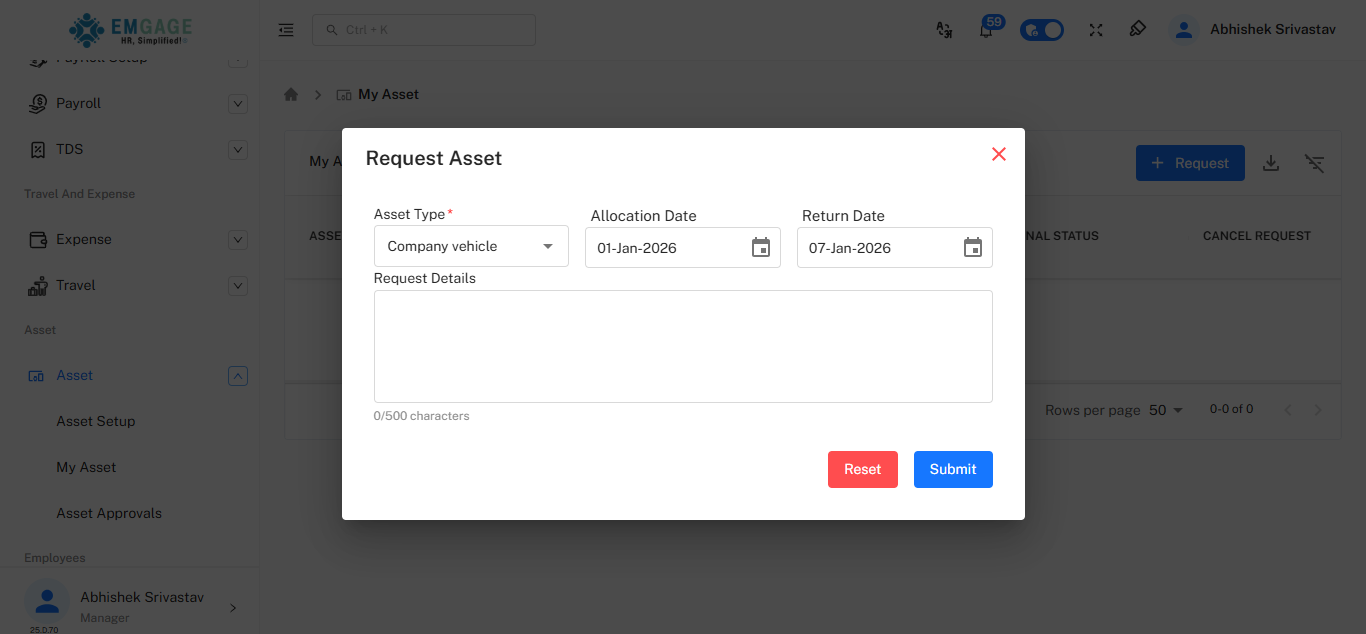
Steps to Request
- Click the + Request button on the main dashboard.
- Asset Type: Select the category of asset required (e.g., Company vehicle, Laptop).
- Dates: Specify the Allocation Date (Start) and Return Date (End).
- Request Details: Enter a reason or specific requirements for the asset.
- Click Submit to send the request to the approval chain.
🔍 Viewing Asset Details
To view specific information about an allocated item, click the Eye icon in the "Actions" column of the main dashboard.
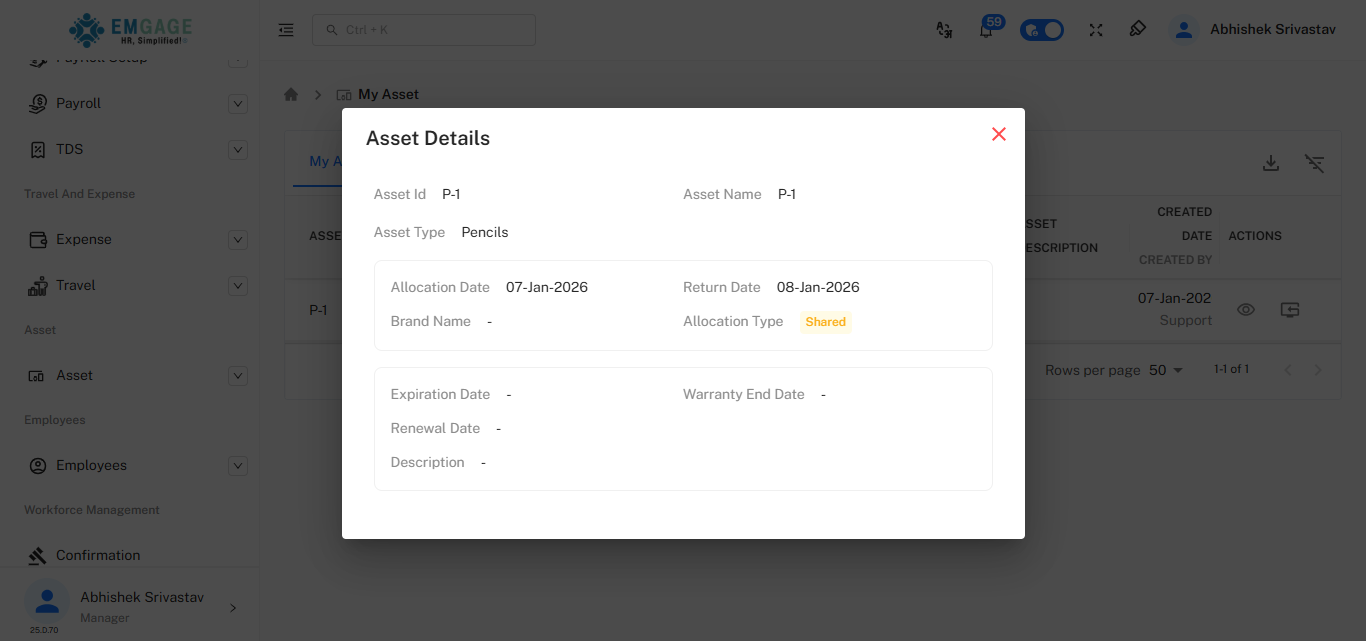
Information Available
- Basic Info: Asset ID, Name, and Type.
- Timeline: Allocation and Return dates.
- Specifics: Brand Name, Serial Numbers, Warranty details, and Expiration dates.
↩️ Returning an Asset
When an asset is no longer needed or the allocation period has ended, the employee must initiate a return.
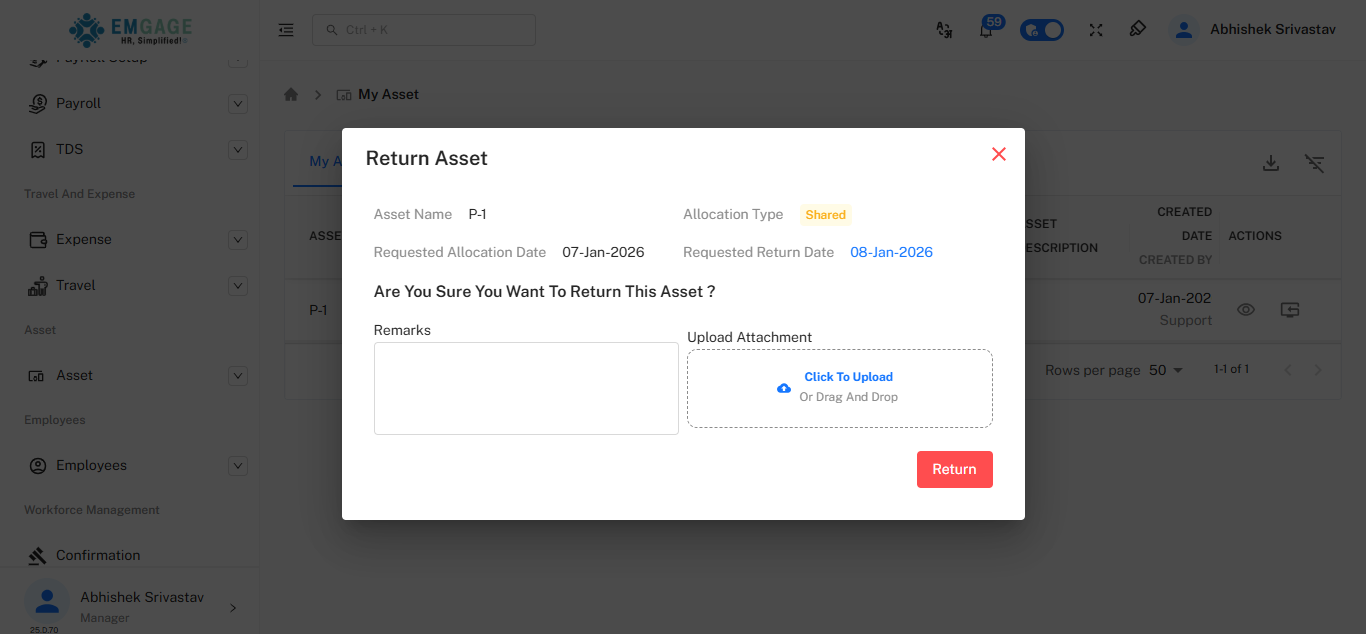
Steps to Return
- Click the Return Icon (box with arrow) next to the asset in the main list.
- Remarks: Add any comments regarding the condition of the asset or reason for return.
- Upload Attachment: (Optional) Upload photos of the asset condition if required.
- Click Return to confirm.
📊 Tracking Return Requests
Once an asset is returned, it moves to the Return Requests tab until the administrator approves the physical handover.
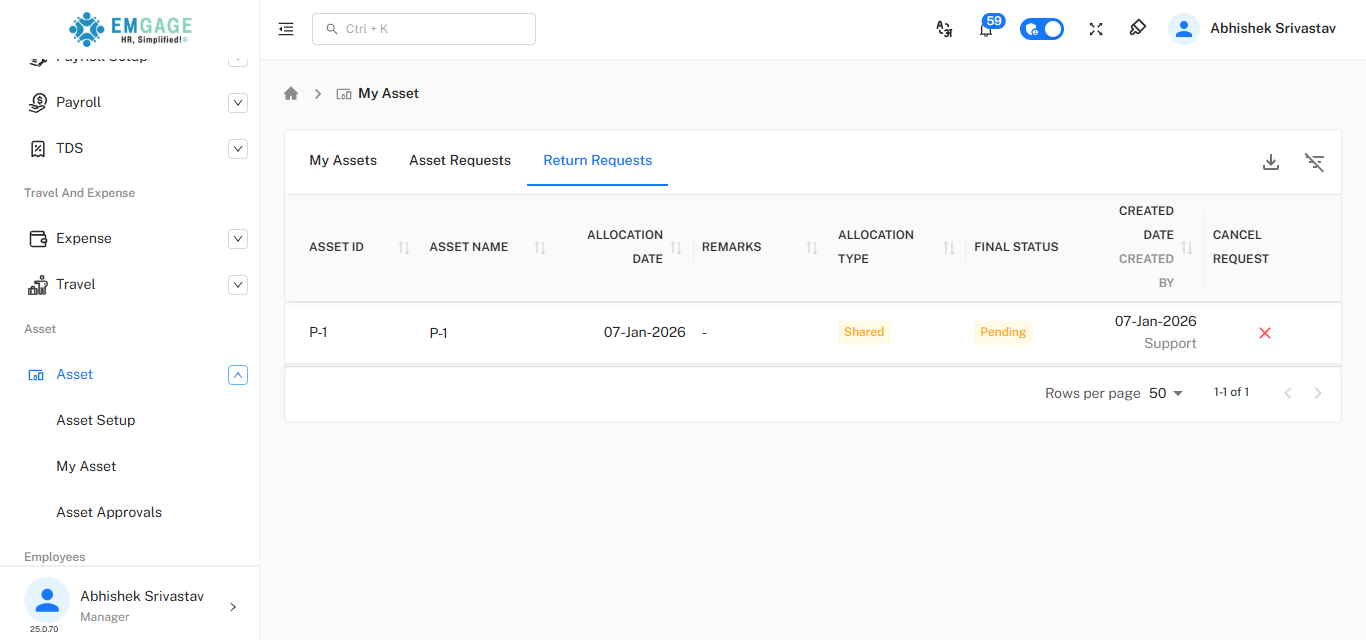
- Status: Shows the current state of the return (e.g., "Pending").
- Cancel Request: If the return was initiated by mistake, click the Red X to cancel the return request and keep the asset active.