Biometric Agent Installer
Complete Installation & Configuration Guide
Overview
This document provides the complete step-by-step installation and configuration guide for the Biometric Agent Installer.
The installer automatically:
- Detects installed database version (MySQL / MSSQL)
- Detects installed Java version
- Installs the required Java version automatically
- Installs the correct biometric agent version
- Configures auto startup on system login
- Runs the biometric agent silently in the background
- Captures and stores the selected MAC Address
- Creates a desktop shortcut for the agent
Note: This installer is for Windows only. macOS and Linux are not supported.
Installer Features
Automatic Database Detection
The installer automatically detects:
- Installed database type (MySQL or MSSQL)
- Installed database version
- Required biometric agent version based on the detected database
Automatic Java Installation
If Java is not installed:
- Installer automatically installs the required Java version silently
- No manual setup or configuration required
- A stable internet connection is required to download Java
Silent Background Execution
The biometric agent:
- Runs silently using
javaw.exe - No CMD window visible
- Automatically starts after restart / login
MAC Address Selection
The installer:
- Detects available network adapters
- Displays available MAC addresses
- Allows copying the MAC address
- Stores the selected MAC address for agent use
Installation Steps
Step 1 — Download the Installer
Download the installer from the link below:
- File:
BiometricAgent_Installer.exe - URL: Download Link
Note: If the installer fails to open, right-click the file and select Run as administrator.
Step 2 — Welcome Screen with System Detection
When launched, the installer automatically scans your system and displays the detected environment.
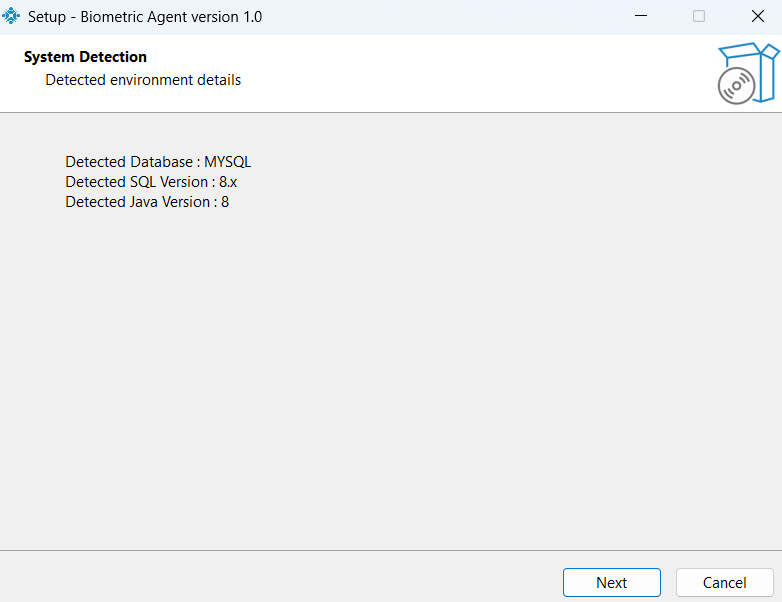
The welcome screen shows:
- Detected Database — e.g., MYSQL
- Detected SQL Version — e.g., 8.x
- Detected Java Version — e.g., 8
Info: No action is required on this screen. Review the detected values and click Next to proceed.
Step 3 — Select MAC Address
The installer displays all available network adapters and MAC addresses from your device.
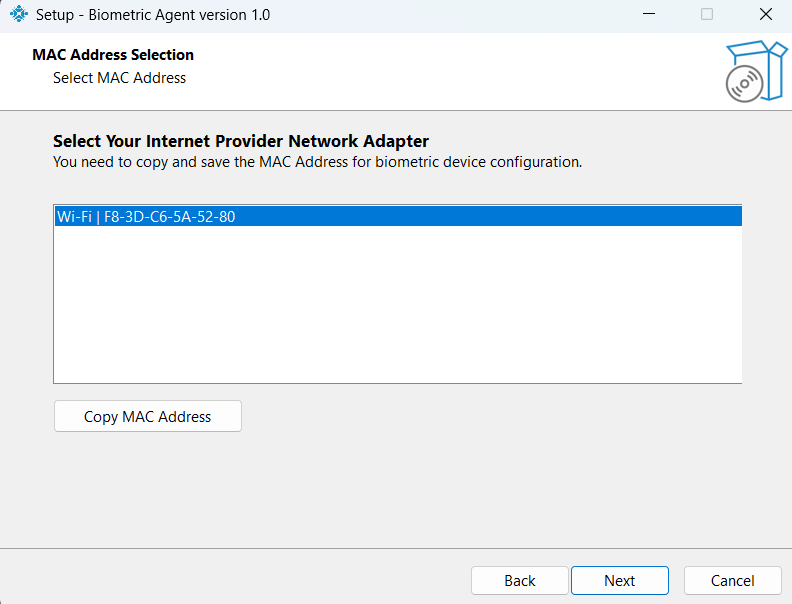
Instructions:
- Select the correct MAC Address from the available network adapters
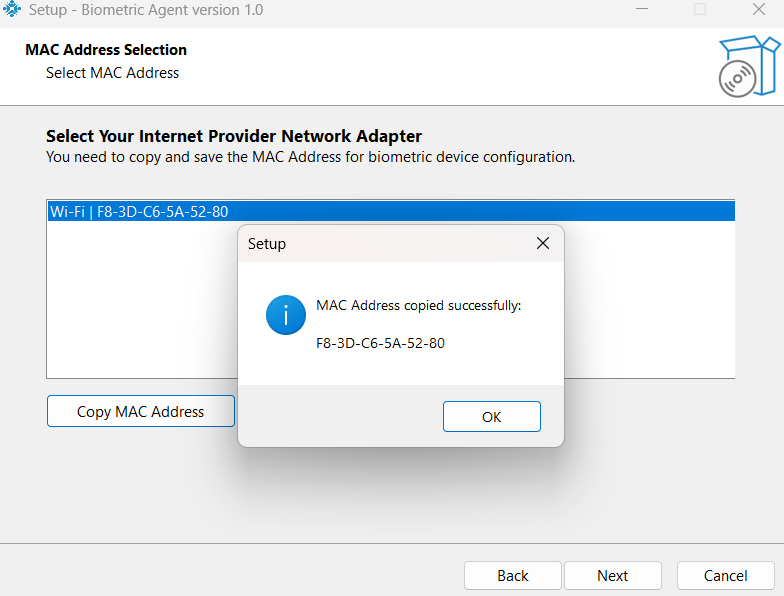
- Click Copy MAC Address to copy the selected MAC Address
- The Next button will remain disabled until the MAC Address is copied
- Save the copied MAC Address securely for future biometric device configuration
- After copying the MAC Address, click Next to continue installation
Mandatory: You must copy and save the MAC Address before proceeding.
This MAC Address is required for biometric device mapping and configuration.
Step 4 — Ready to Install
The installer confirms it is ready to begin installation.
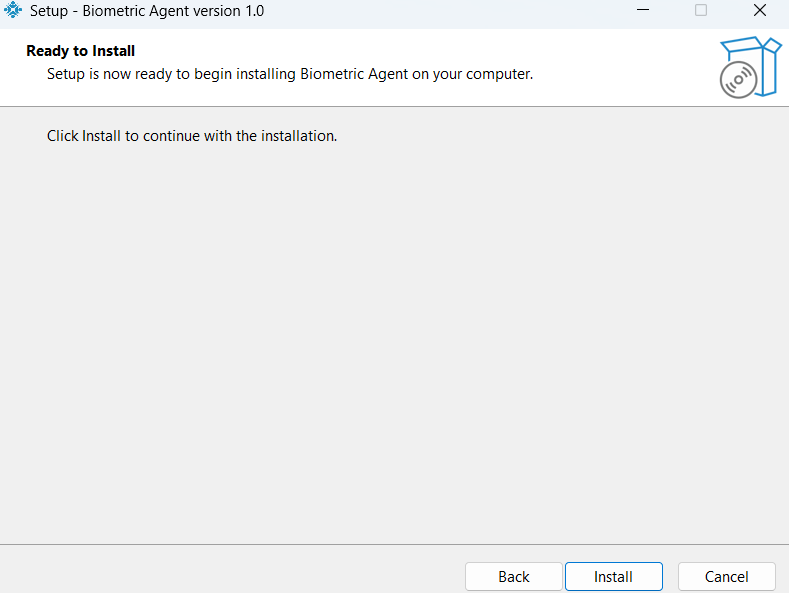
- Review the screen and click Install to begin.
- Click Back to go back and make changes, or Cancel to exit.
Step 5 — Agent Installation
The installer automatically installs the biometric agent files.
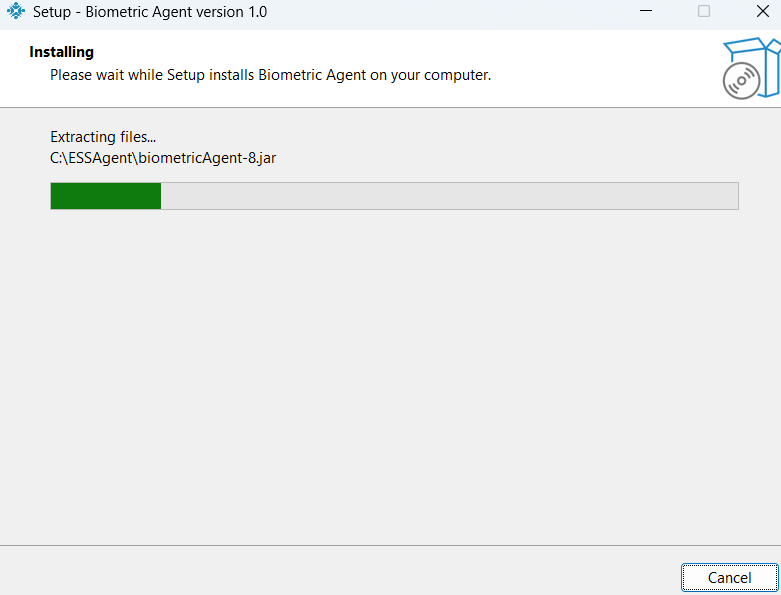
The installer:
- Extracts and installs biometric agent files to
C:\ESSAgent
(e.g.,C:\ESSAgent\biometricAgent-8.jar) - Configures auto startup on user login via the Windows Registry
- Creates a desktop shortcut for the biometric agent
- Starts the agent silently in the background
Note: Do not close the installer during this step. Wait for the progress bar to complete.
Step 6 — Finish Installation
Once installation is complete, the Setup Wizard finish screen appears.
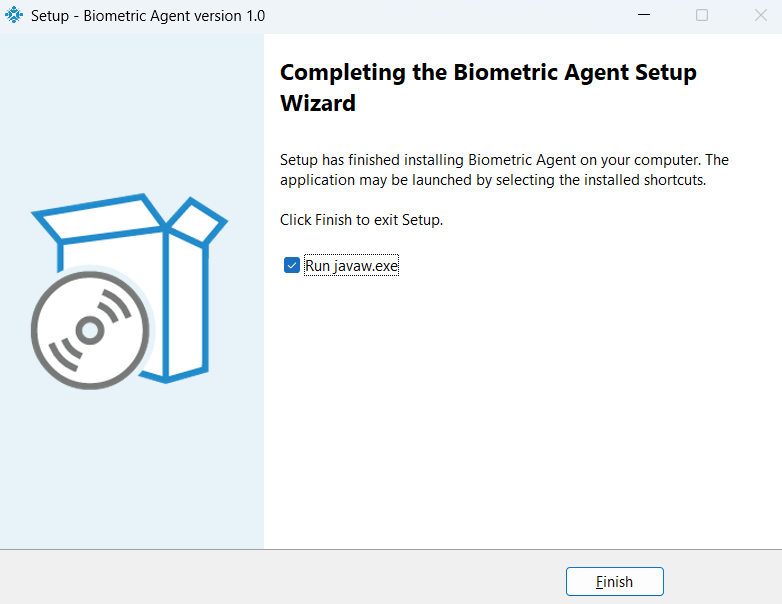
On this screen:
- Check the box next to Run javaw.exe and click Finish to immediately auto-start the biometric agent.
- If the box is left unchecked, the agent will not start immediately — launch it manually using the desktop shortcut.
Tip: It is recommended to keep the checkbox checked so the agent starts right away without requiring a manual launch or system restart.
Post-Installation
Installation Directory
Default installation path:
C:\ESSAgent
Desktop Shortcut
A desktop shortcut is automatically created during installation. Use it to manually launch the agent if it is not running.
Auto Startup
The biometric agent automatically starts:
- After restart
- After shutdown / start
- After user login
No manual startup required.
Background Execution
The biometric agent runs silently:
- No CMD window visible
- Runs using
javaw.exe
Troubleshooting
Installer Not Opening
Solution: Right-click BiometricAgent_Installer.exe and select Run as administrator.
Java Installation Fails
Possible causes and solutions:
- No internet connection — Ensure the device is online and retry.
- Firewall or proxy blocking download — Temporarily disable the firewall or whitelist the installer, then retry.
- Insufficient disk space — Free up disk space and re-run the installer.
Agent Does Not Start After Reboot
Solution:
- Use the desktop shortcut to launch the agent manually.
- Re-run the installer as administrator if the entry is missing.
MAC Address Not Detected
Solution:
- Ensure at least one network adapter (wired or wireless) is enabled.
- Check Device Manager to confirm adapters are not disabled.
- Restart the installer after enabling a network adapter.
How to Stop the Agent
Step 1 — Open Task Manager
Use the keyboard shortcut:
Ctrl + Shift + Esc
Step 2 — Go to the Details Tab
Click on the Details tab in Task Manager.
Step 3 — Find the Process
Look for either of the following process names:
javaw.exeOpenJDK Platform Binary
Step 4 — End the Task
Right-click the process and select End Task.
Important Notes
Administrator Access
The installer requires administrator permissions because:
- Java installation requires elevation
- Registry startup configuration requires elevation
- System-level installation is performed in protected directories
Uninstallation
To remove the biometric agent:
- Delete the installation folder:
C:\ESSAgent - Delete the desktop shortcut manually
Biometric Agent Installer Guide — End of Document