Candidate Offer Setup
Overview
The Candidate Offer Setup module allows administrators to configure and manage the complete offer letter process, from creating templates to obtaining approvals and collecting candidate documents.
Using this module, you can:
- Configure offer email templates.
- Set up offer approval workflows.
- Create and manage offer letter templates.
- Define document checklists for candidates.
- Automatically convert accepted offers into joining forms.
Candidate Offer Setup Components
1. Email Setup
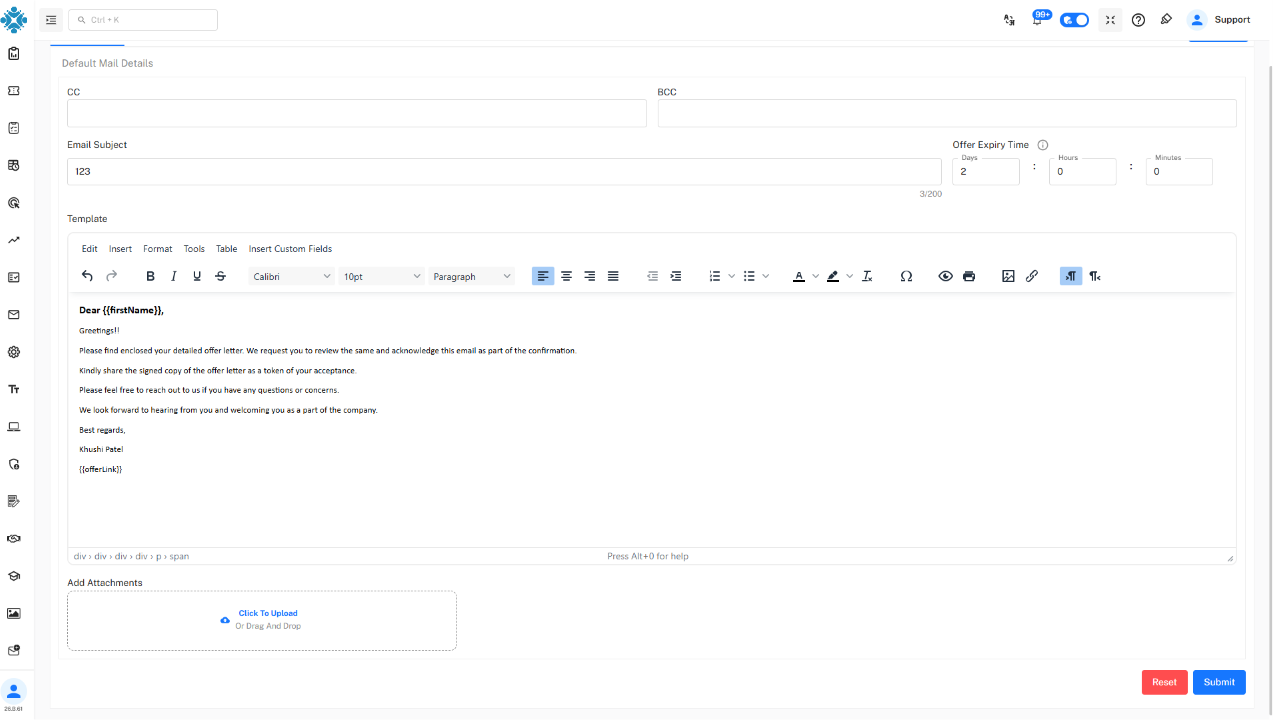
The Email Setup section is used to configure the email that will be sent to candidates along with their offer letter.
You can configure:
- Email Subject
- Email Body
- Sender Information
- Offer Communication Settings
Note: This email will be used whenever an offer letter is sent to a candidate.
2. Configuration Setup
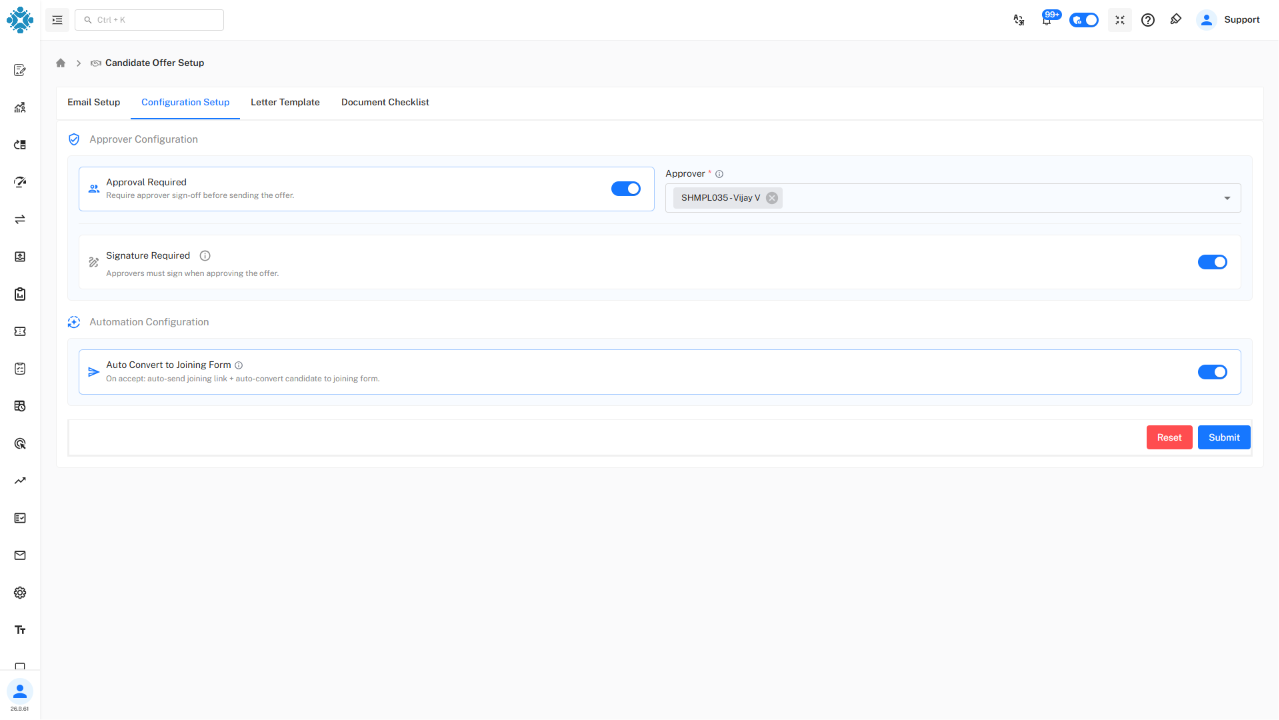
The Configuration Setup section allows you to define the approval process and automate post-offer activities.
-
Approval Configuration
Configure how offer approvals are handled before an offer is sent. -
Approval Required
Enable this option if every offer must be approved before it can be sent to the candidate. -
Select Approver
Choose the employee or manager responsible for approving offer letters. -
Signature Required
Enable this option if the approver's signature must be included on the final offer letter. -
Automation Configuration
-
Auto Convert to Joining Form
When enabled, the system automatically creates a Joining Form after the candidate accepts the offer.The workflow is:
- Candidate accepts the offer.
- The system automatically generates a Joining Form.
- The candidate can continue with the onboarding process.
3. Letter Template
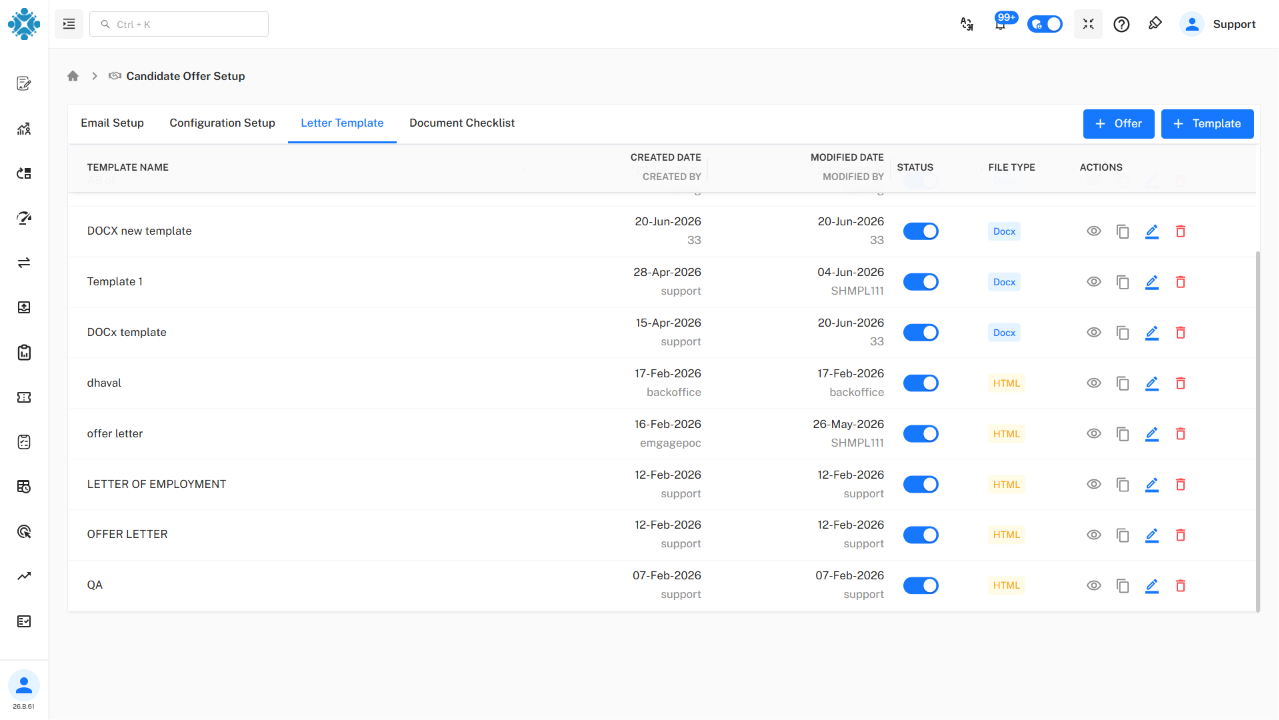
Letter Templates are used to automatically generate offer letters for candidates.
The system provides two methods for creating templates.
-
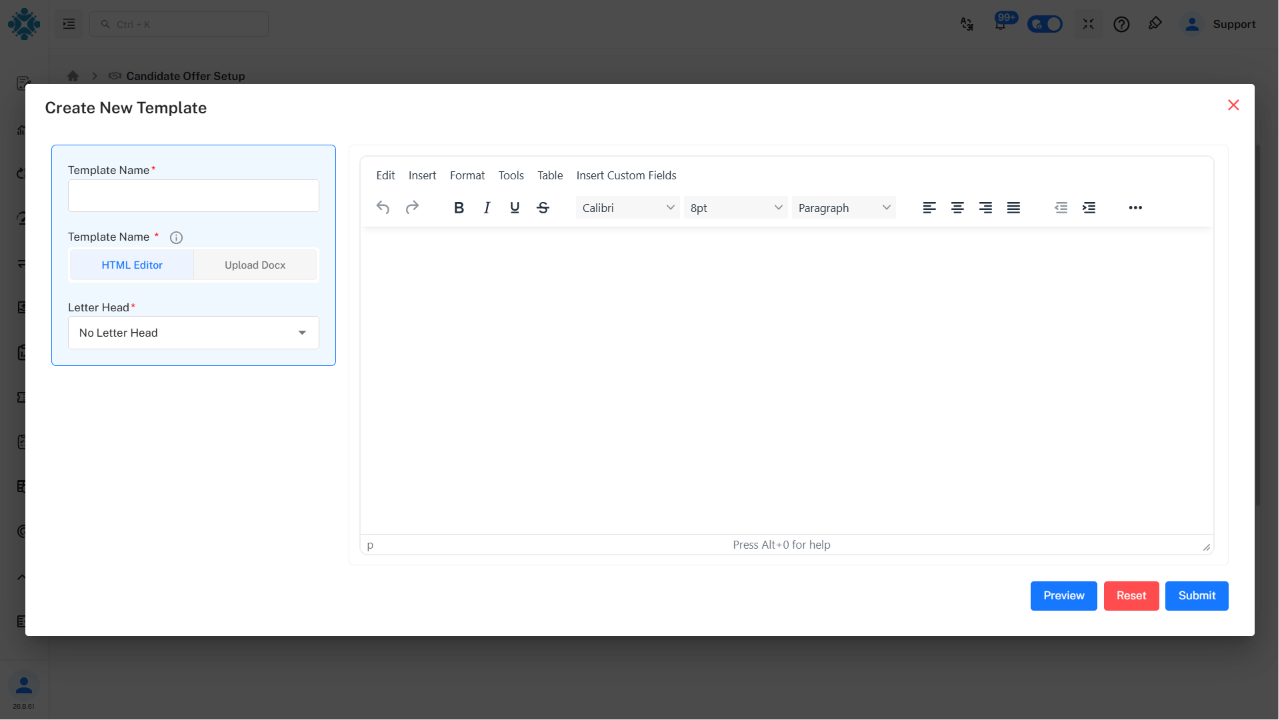
Option 1: HTML Editor
Create and format the offer letter directly using the built-in HTML editor. -
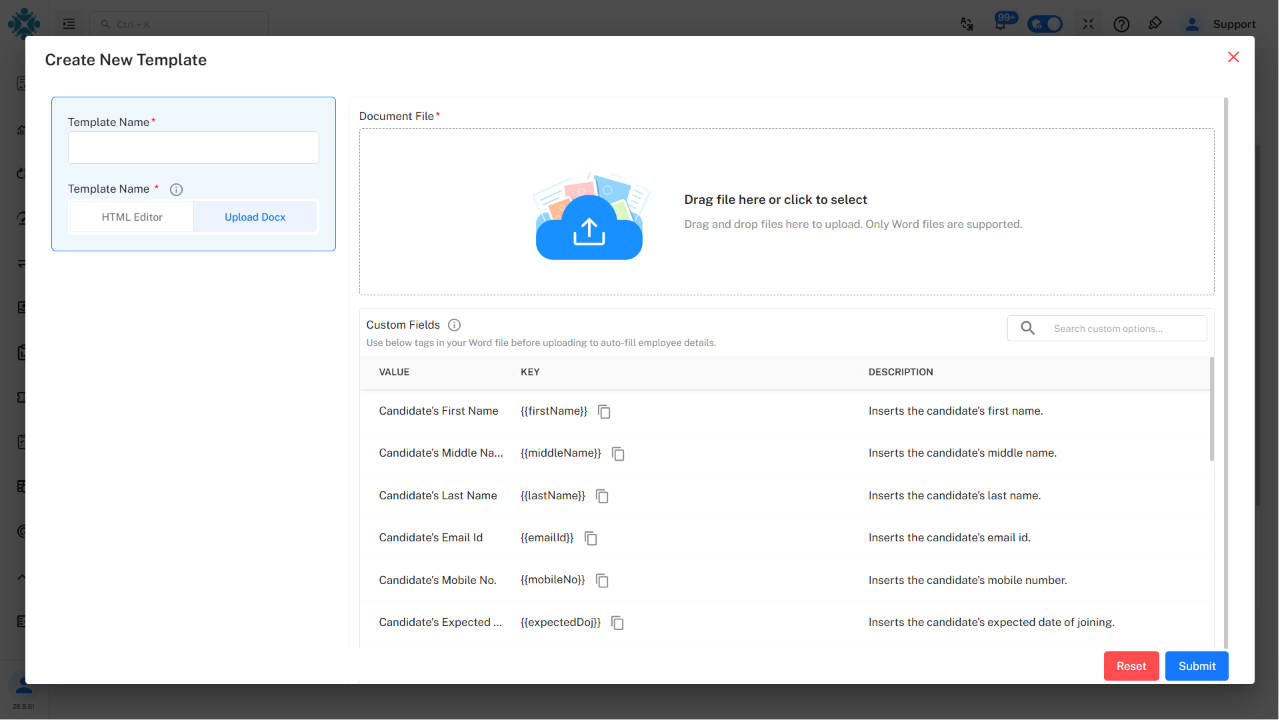
Option 2: Upload DOCX
Upload an existing Microsoft Word (.docx) document as an offer letter template. You can insert system placeholders (dynamic fields) that will automatically be replaced with candidate information when the offer letter is generated. -
Common Dynamic Fields Some commonly used placeholders include:
- Candidate First Name
- Candidate Last Name
- Email Address
- Mobile Number
- Expected Joining Date
- Designation
- Department
- Annual CTC
Note: Dynamic fields eliminate the need for manually editing offer letters for each candidate.
4. Document Checklist
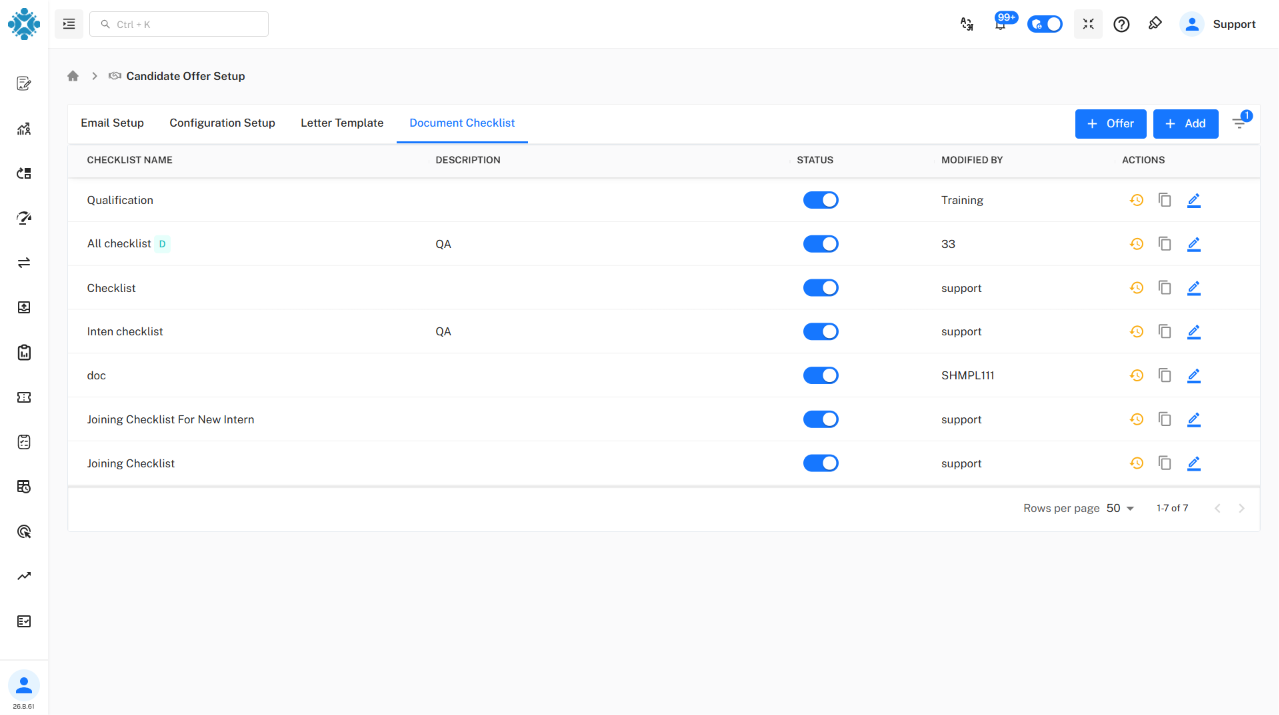
The Document Checklist defines the list of documents that candidates must submit during the hiring process.
Common documents include:
- Educational Certificates
- Identity Proof
- Address Proof
- Experience Certificates
- Passport-size Photograph
Each checklist can be configured as:
- Active/Inactive – Controls whether the checklist is available for use.
- Default Checklist – Automatically assigns the checklist to newly created offers.
Creating a Document Checklist
Follow these steps to create a new document checklist:
- Navigate to Candidate Offer Setup → Document Checklist.
- Click Add.
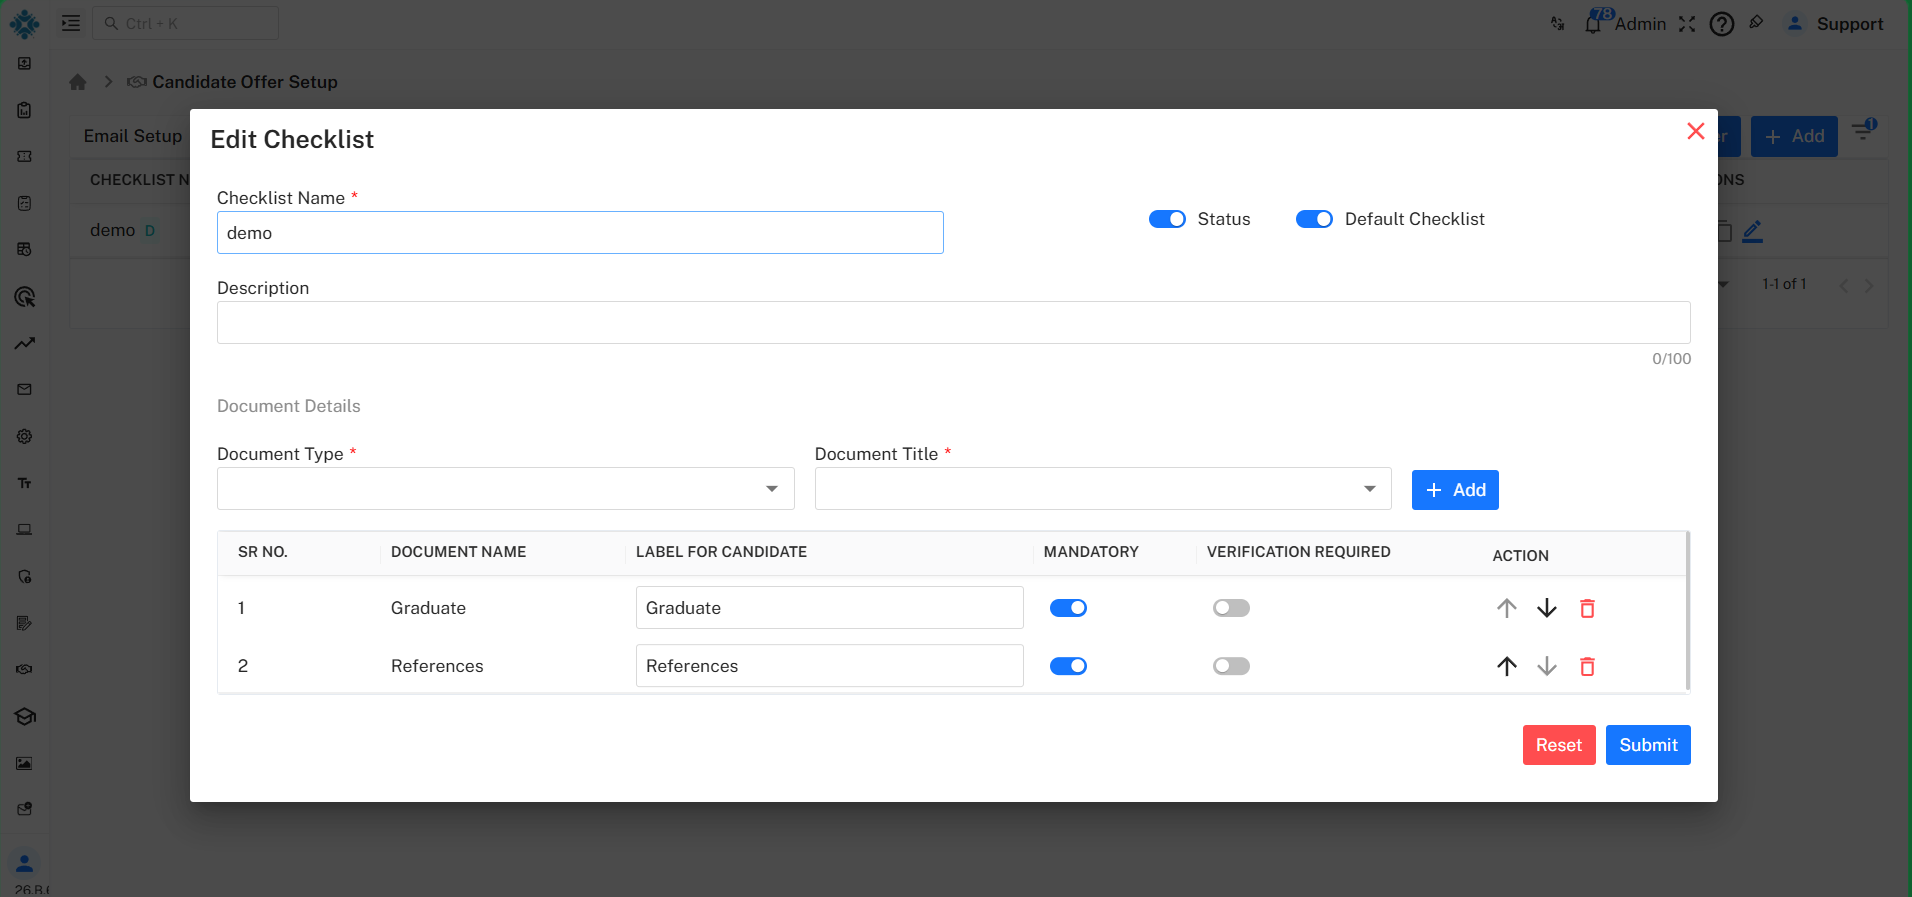
- Enter the Checklist Name.
- (Optional) Enter a description.
- Enable Status to make the checklist active.
- Enable Default Checklist if it should be assigned automatically.
- Select:
- Document Type
- Document Title
- Click Add to include the document in the checklist.
- Repeat the process to add additional documents.
- Click Submit or Save.
Creating a Letter Template
Follow these steps to create a new offer letter template:
- Navigate to Candidate Offer Setup → Letter Template.
- Click Template.
- Enter the Template Name.
- Choose one of the following methods:
- HTML Editor
- Upload DOCX
- If using DOCX:
- Upload the Word document.
- Insert supported dynamic fields where required.
- If using the HTML Editor:
- Design the offer letter.
- Insert dynamic fields from the available list.
- Preview the template.
- Click Submit to save the template.
Creating a Candidate Offer
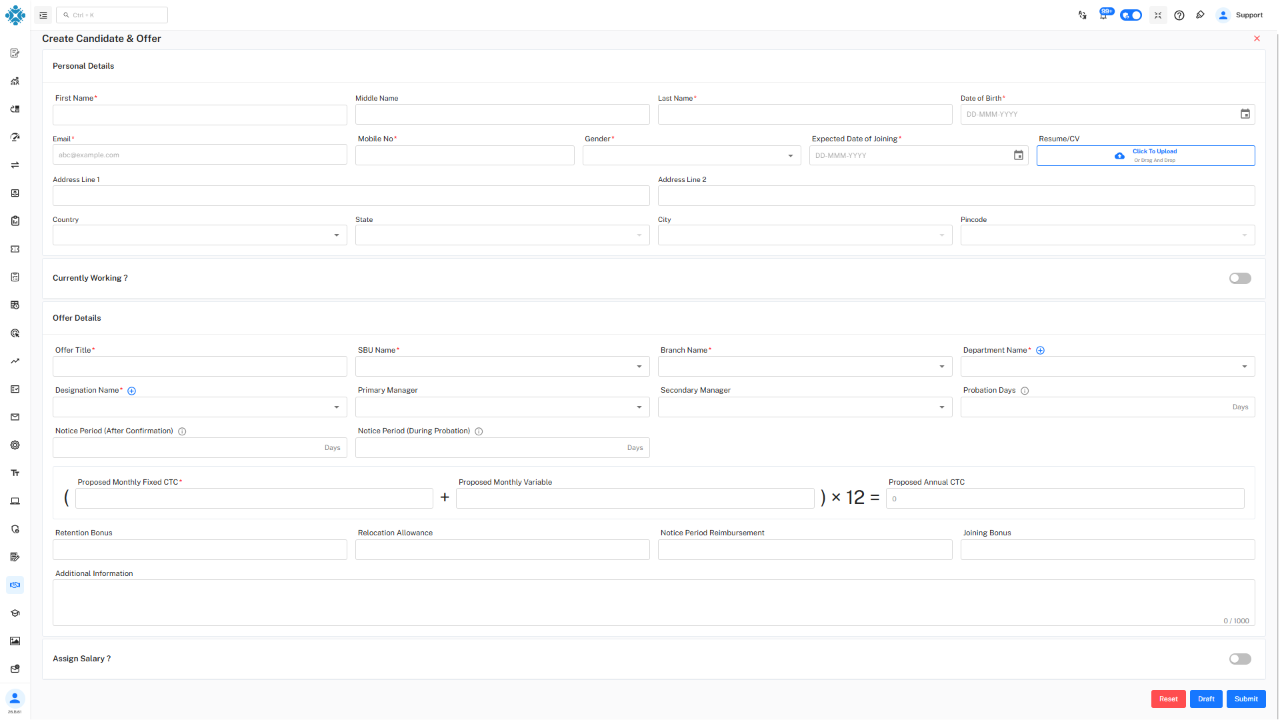
After completing the Candidate Offer Setup, you can create an offer for a candidate.
Step 1: Enter Candidate Information
Provide the candidate's basic details:
- First Name
- Last Name
- Email Address
- Mobile Number
- Date of Birth
- Expected Joining Date
- Address Details
Upload the candidate's Resume/CV.
Step 2: Enter Offer Details
Provide the employment details, including:
- Offer Title
- SBU
- Branch
- Department
- Designation
- Reporting Manager(s)
- Probation Period
Step 3: Enter Compensation Details
Provide the salary information, such as:
- Fixed Monthly CTC
- Variable Monthly CTC
- Annual CTC
- Joining Bonus
- Retention Bonus
- Relocation Allowance
Step 4: Additional Information
- Add remarks, if required.
- Enable Assign Salary if the employee's salary structure should be assigned during offer creation.
Step 5: Save or Submit
Choose one of the following actions:
- Draft – Saves the offer for future editing.
- Submit – Sends the offer for approval or directly proceeds based on the configured workflow.
Offer Lifecycle
The typical offer process follows the sequence below:
   Candidate Offer Created
            │
            ▼
   Approval Process Initiated
            │
            ▼
   Offer Approved
            │
            ▼
   Offer Letter Generated
            │
            ▼
   Offer Sent to Candidate
            │
            ▼
   Candidate Accepts Offer
            │
            ▼
   Joining Form Created (If Auto Conversion is Enabled)
            │
            ▼
   Candidate Onboarding Begins
Best Practices
- Configure approvers before creating candidate offers.
- Use dynamic fields in letter templates to avoid manual edits.
- Keep document checklists updated and standardized.
- Review offer templates regularly to ensure accuracy.
- Preview templates before sending offers to candidates.
- Use the Draft option when an offer requires further review before submission.