Separation List and Approval
Last Updated: October 22, 2025 Document Version: 1.0 Prepared for: Emgage HRMS Implementation Team
System Overview
The Separation List/Approval module under the Separation section enables administrators and HR personnel to efficiently manage employee separation requests from initiation to approval.
It includes list management, request creation, import functionality, and approval workflows, ensuring all separation processes follow organizational policy and audit standards.
Navigation Path
Path:
Separation → Separation List/Approval
The page contains two main tabs:
- List Tab – Displays all separation requests (default view).
- Approval Tab – Used for approving or rejecting pending separation requests.
Each tab contains tables, filters, and action buttons for easy tracking and management.
Step 1: List Tab
Navigation
Separation → Separation List/Approval → List
(Default tab opens here.)
Table Fields
- Employee
- Separation Type (Resignation, Termination, Retirement, End of Contract)
- Application Date
- Relieving Date (As Per NP)
- Requested Relieving Date
- Actual Relieving Date (Editable – click edit icon beside the record)
- Reason
- Approval Status (Approve, Pending, Reject, Revoked/Pullback)
- Clearance (Initiated, Not Initiated, Required, Not Required, POC Clearance, HR Clearance)
- Exit Interview (Initiated, Not Initiated, Required, Not Required, Completed)
- Separation Status (Approved, Rejected, Resigned, Revoked, F&F Pending, F&F Paid)
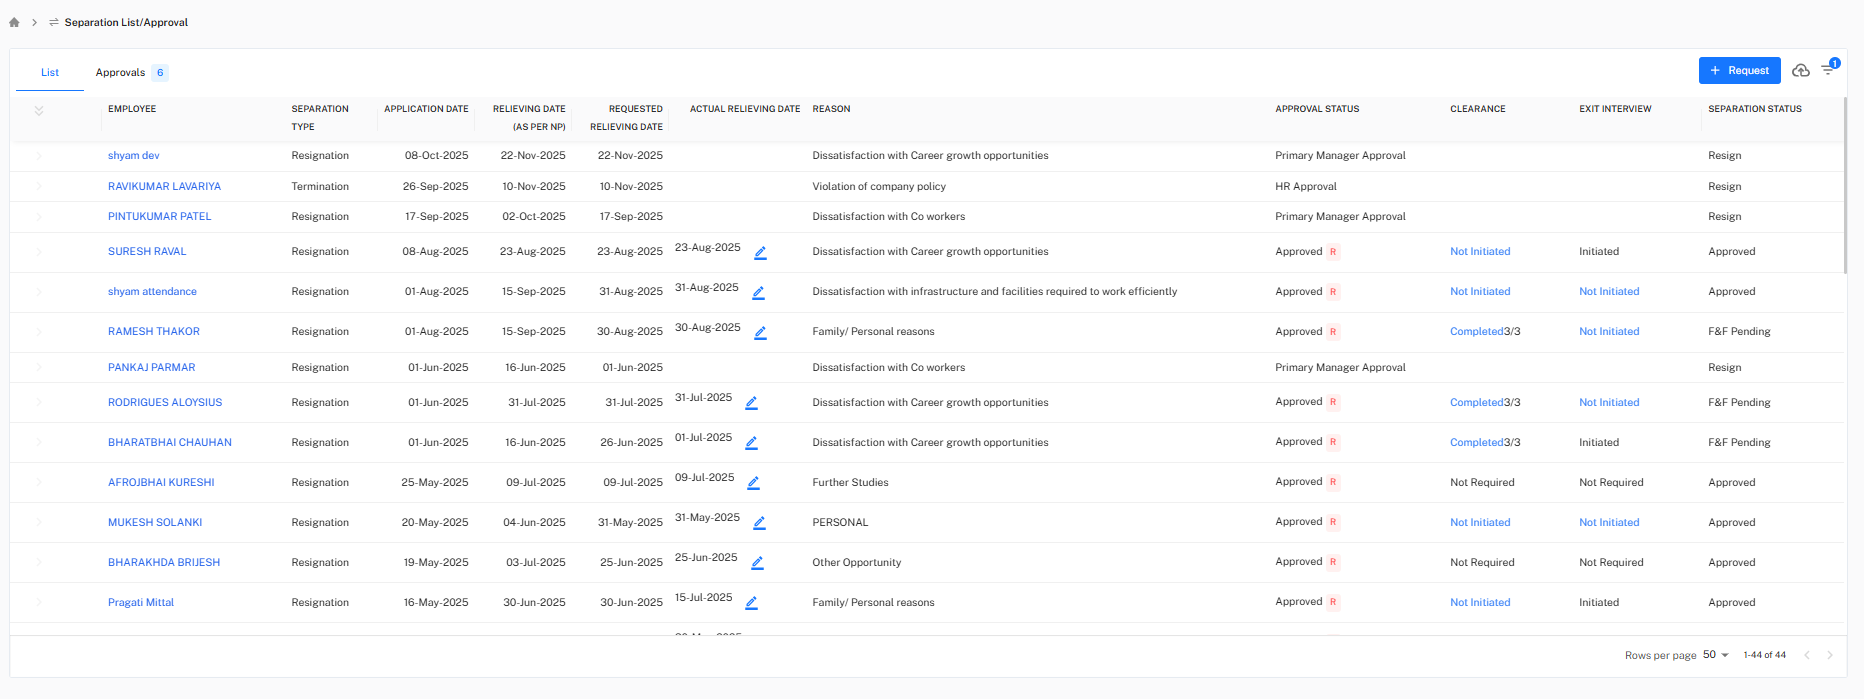
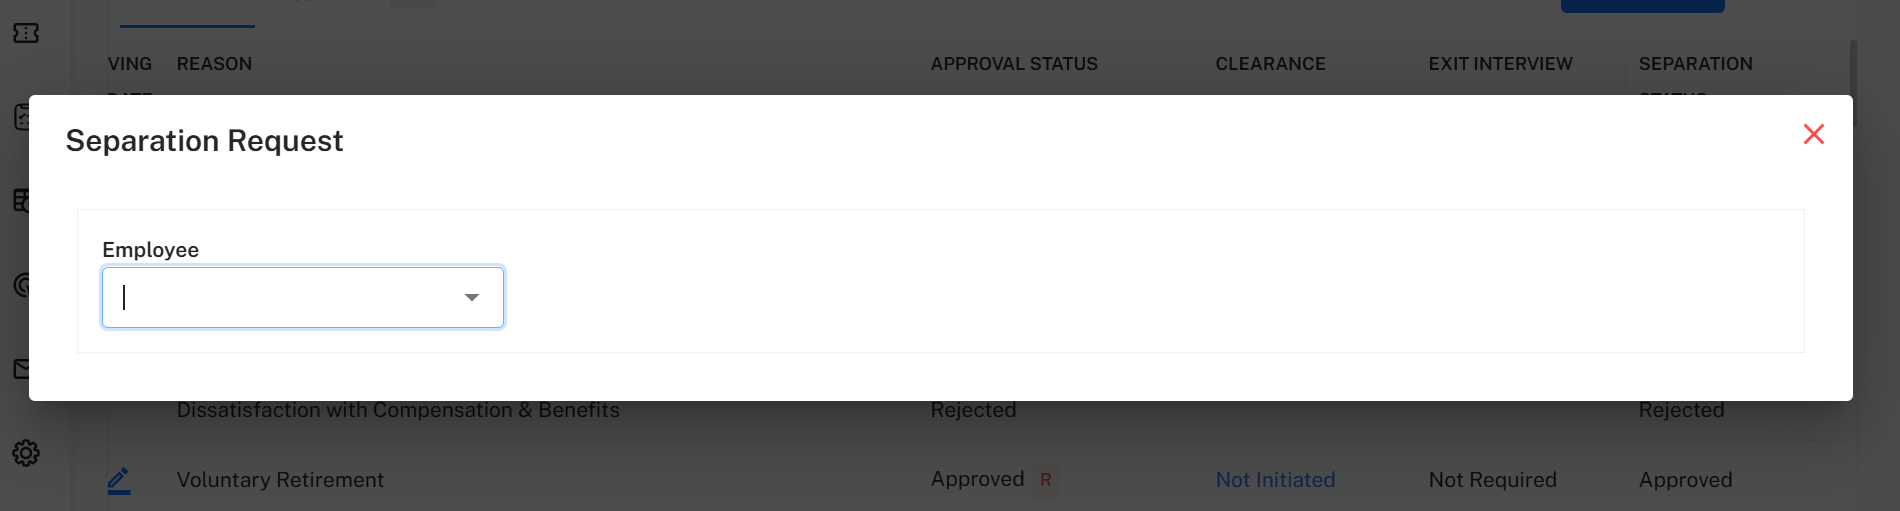
+ Request Button
Click + Request to open a popup and submit a new employee separation request.
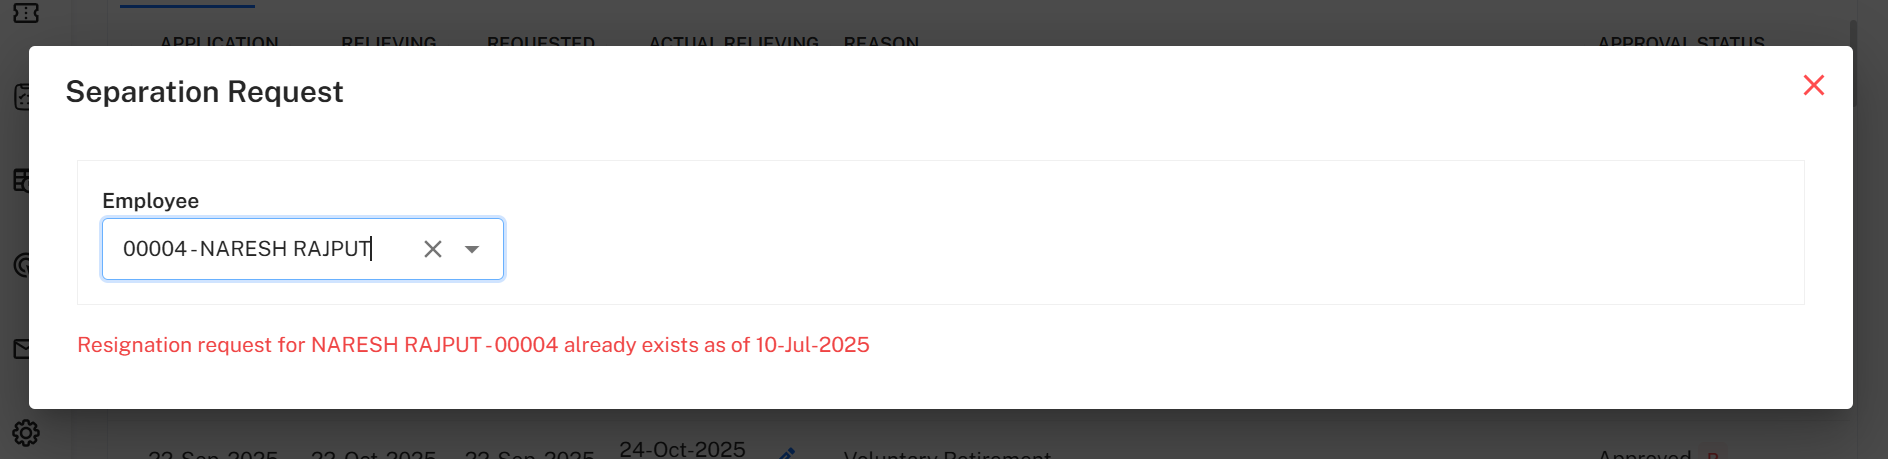
Step 1: Select Employee
Select the employee from the Employee dropdown.
Warning 1: If a separation request for the selected employee already exists, the system displays: “Resignation request for the particular employee already exists.”
Warning 2: If no notice period is assigned to the employee, the message appears: “Notice period for this employee has not been specified.”
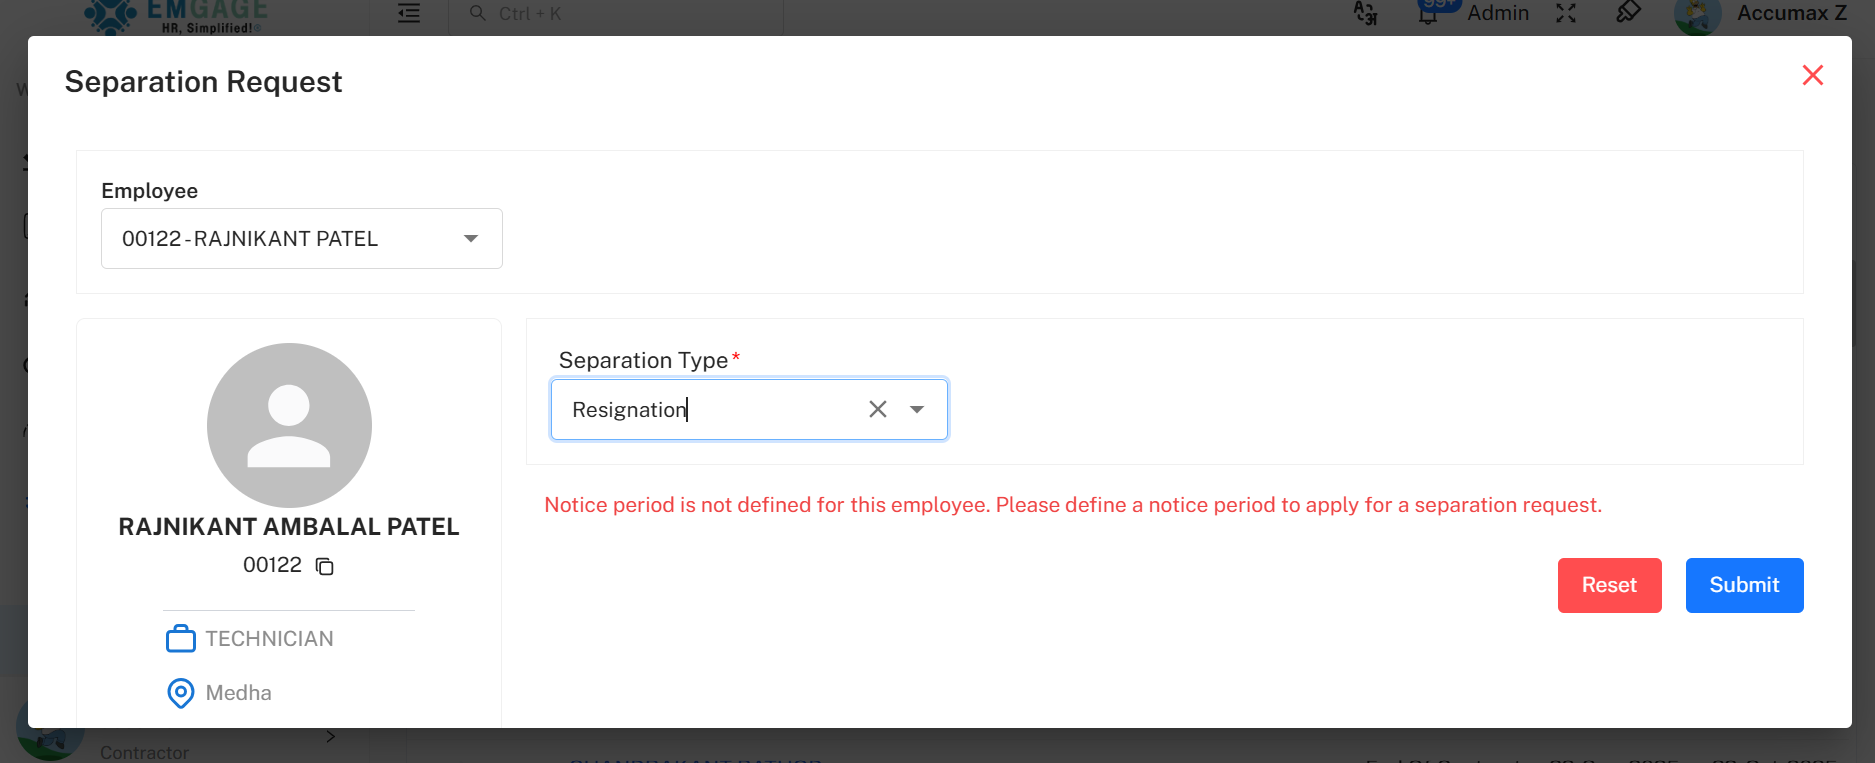
To resolve:
Navigate to Separation → Separation Setup → Notice Period and either:
- Edit an existing policy to assign it to the employee, or
- + Add a new policy and set its applicability to a department or employee.
Step 2: Separation Details (Dynamic Fields)
After selecting an employee, choose the Separation Type — the form fields vary automatically based on the selection.
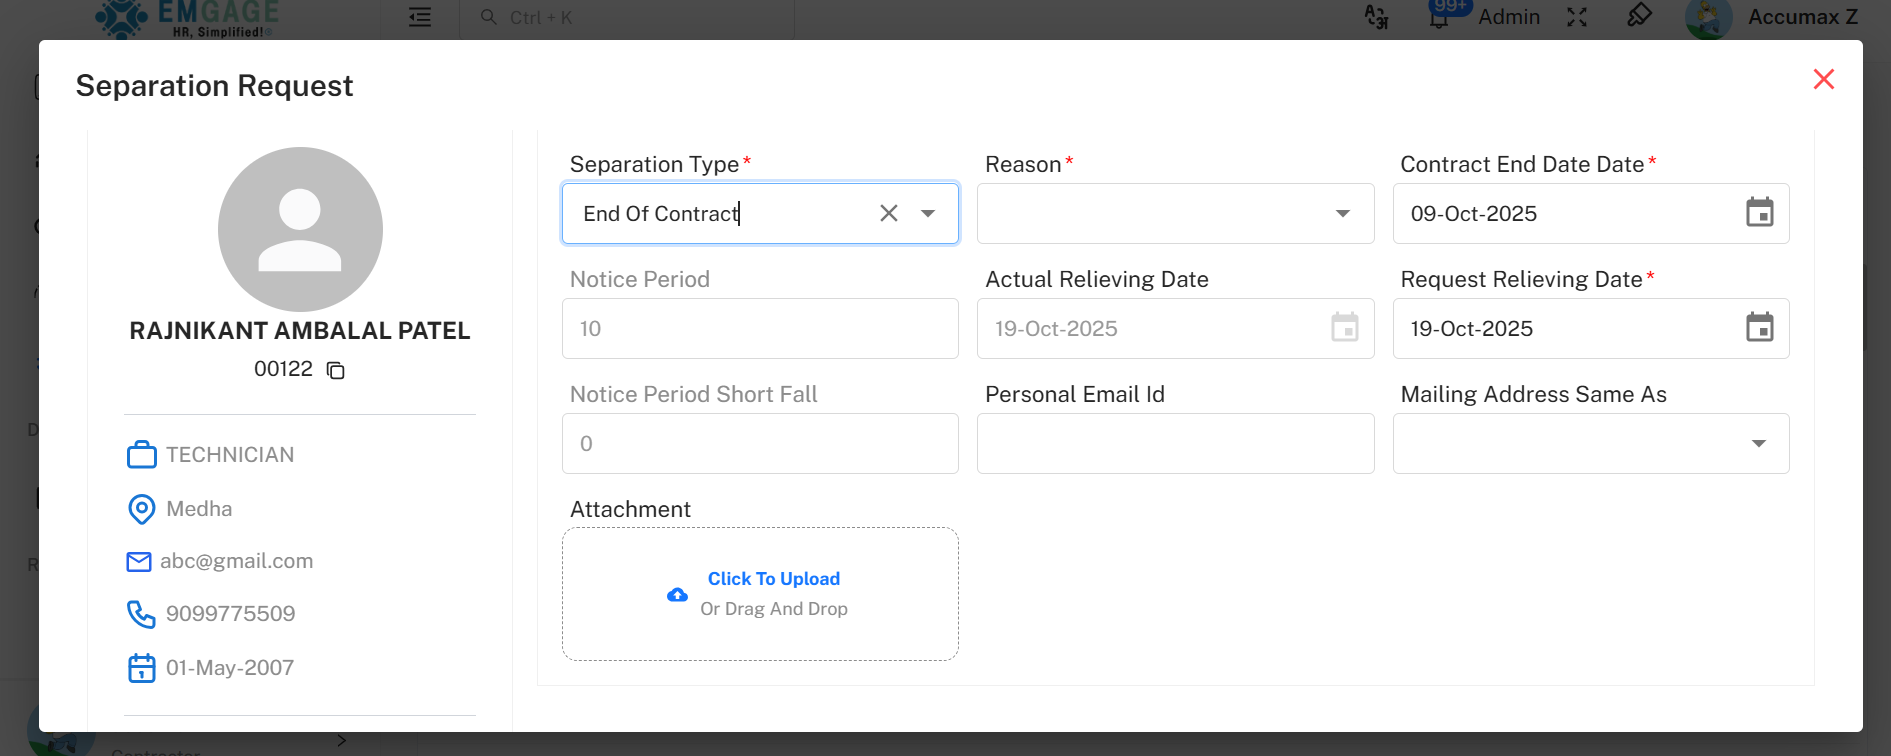
Separation Type: End of Contract
Fields Displayed:
- Separation Type*
- Reason*
- Contract End Date*
- Notice Period
- Actual Relieving Date
- Requested Relieving Date*
- Notice Period Shortfall
- Personal Email ID
- Mailing Address Same As
- Attachment
Popup Buttons: Reset | Submit | (Close)
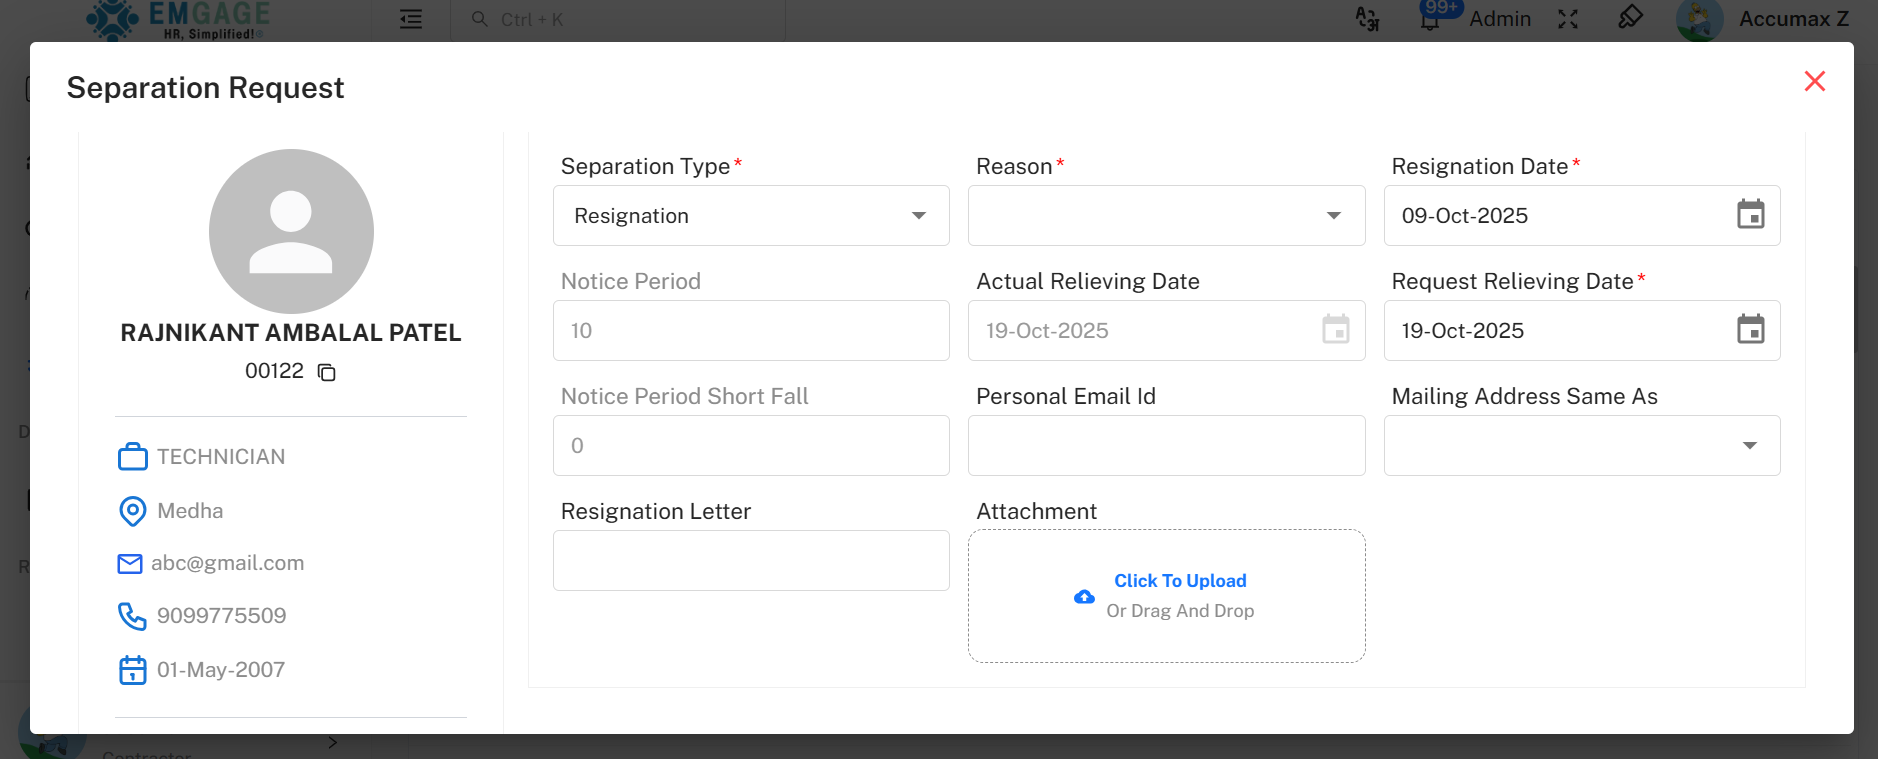
Separation Type: Resignation
Fields Displayed:
- Separation Type*
- Reason*
- Resignation Date*
- Notice Period
- Actual Relieving Date
- Requested Relieving Date*
- Notice Period Shortfall
- Personal Email ID
- Mailing Address
- Resignation Letter
- Attachment
Popup Buttons: Reset | Submit | (Close)
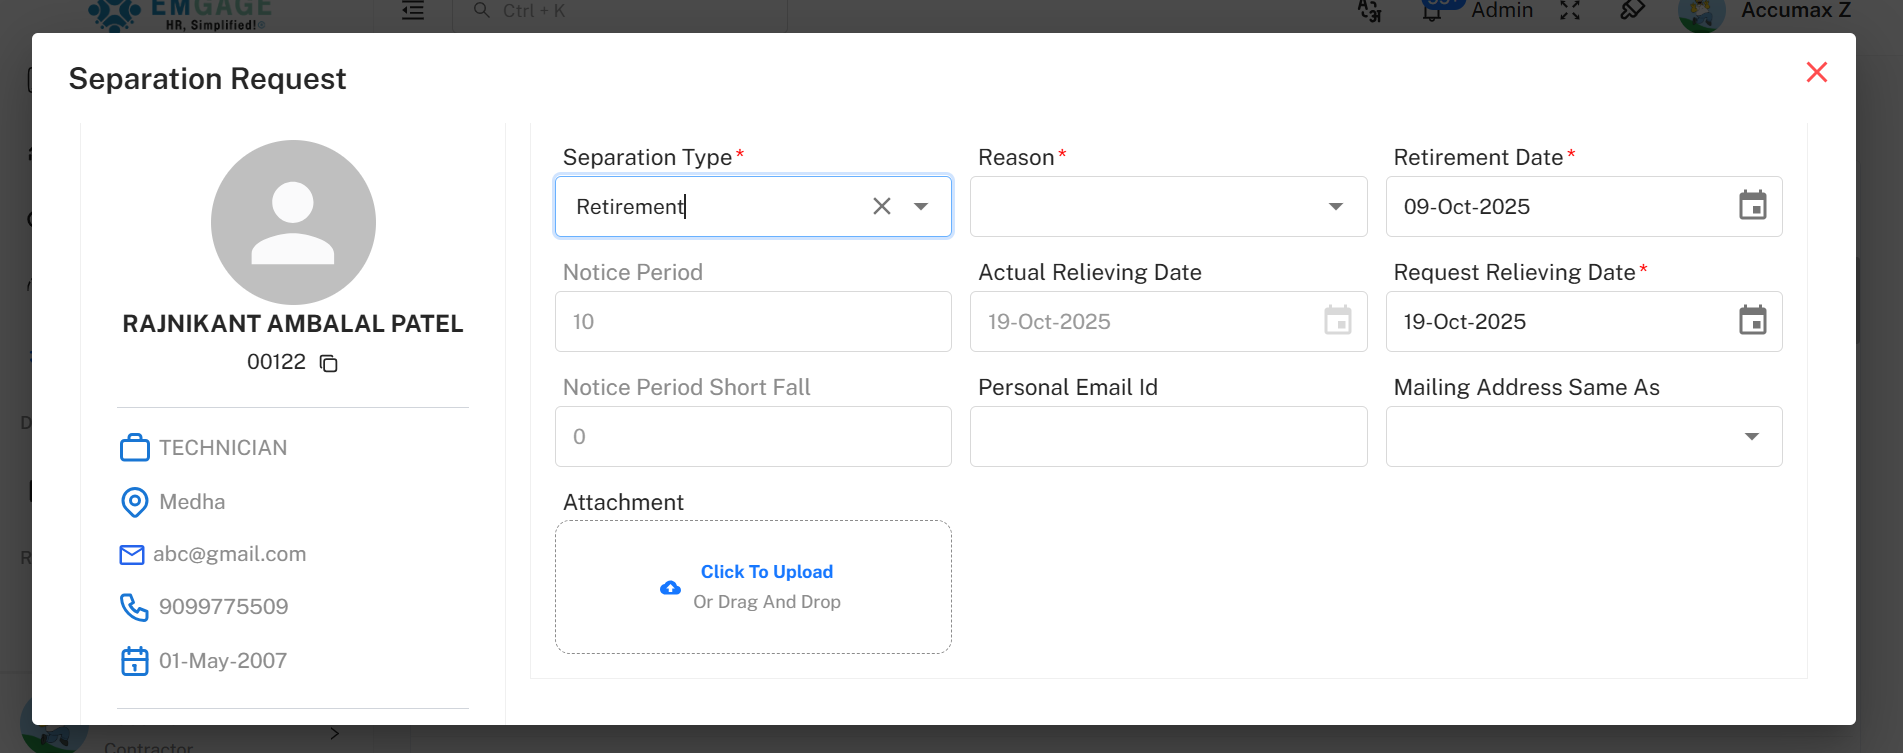
Separation Type: Retirement
Fields Displayed:
- Separation Type*
- Reason*
- Retirement Date*
- Notice Period
- Actual Relieving Date
- Requested Relieving Date*
- Notice Period Shortfall
- Personal Email ID
- Mailing Address (Same As checkbox)
- Attachment
Popup Buttons: Reset | Submit | (Close)
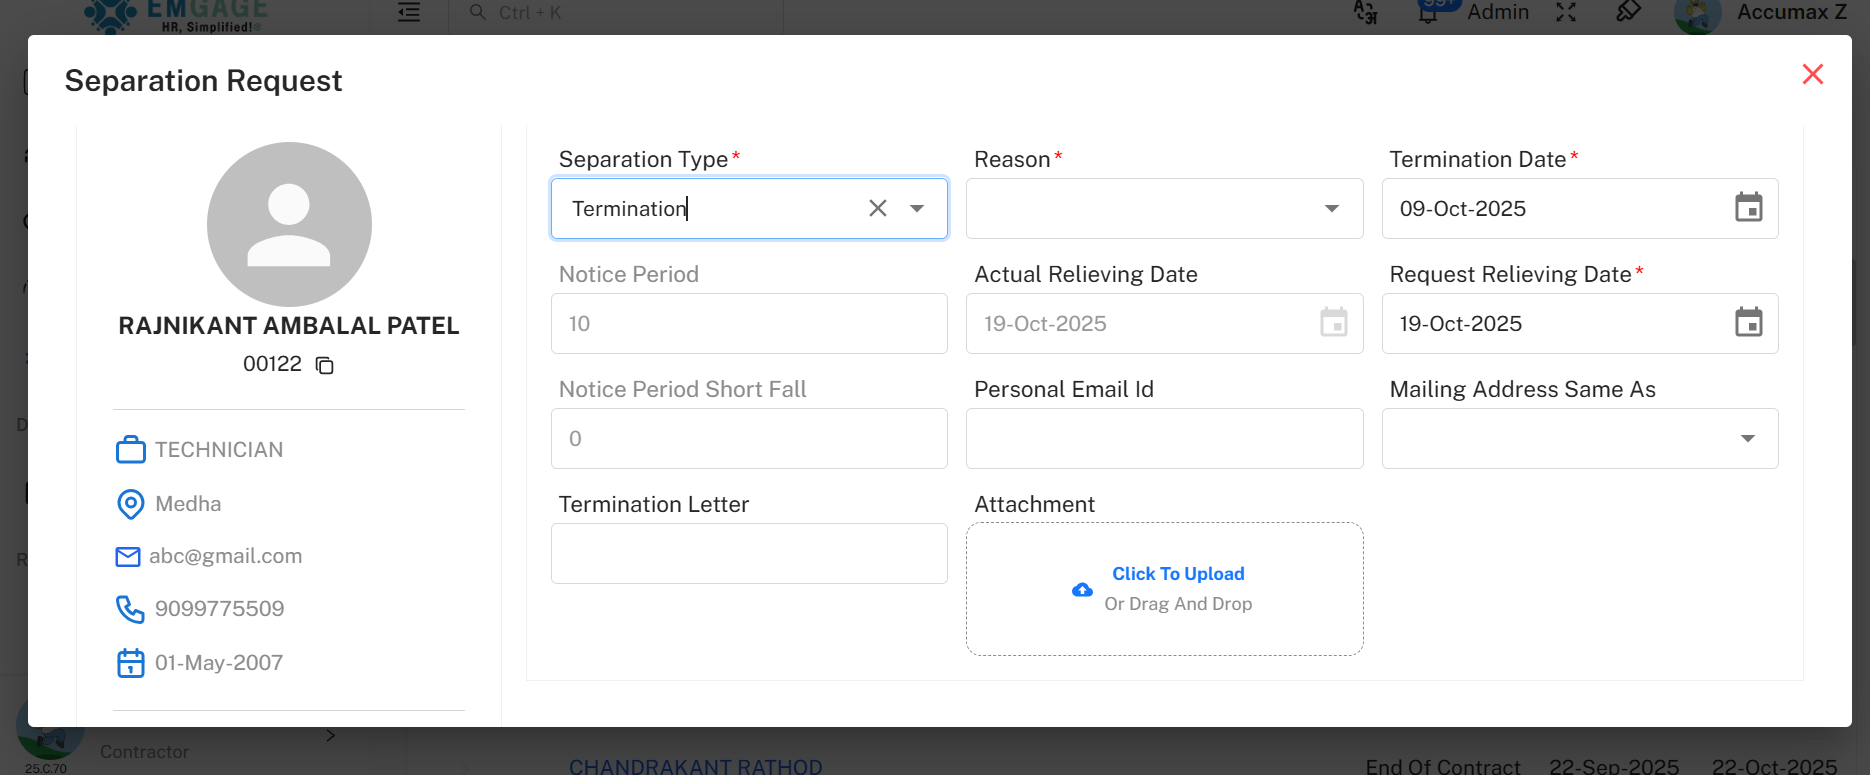
Separation Type: Termination
Fields Displayed:
- Separation Type*
- Reason*
- Termination Date*
- Notice Period
- Actual Relieving Date
- Requested Relieving Date*
- Notice Period Shortfall
- Personal Email ID
- Mailing Address (Same As checkbox)
- Termination Letter
- Attachment
Popup Buttons: Reset | Submit | (Close)
Other Options in List Tab
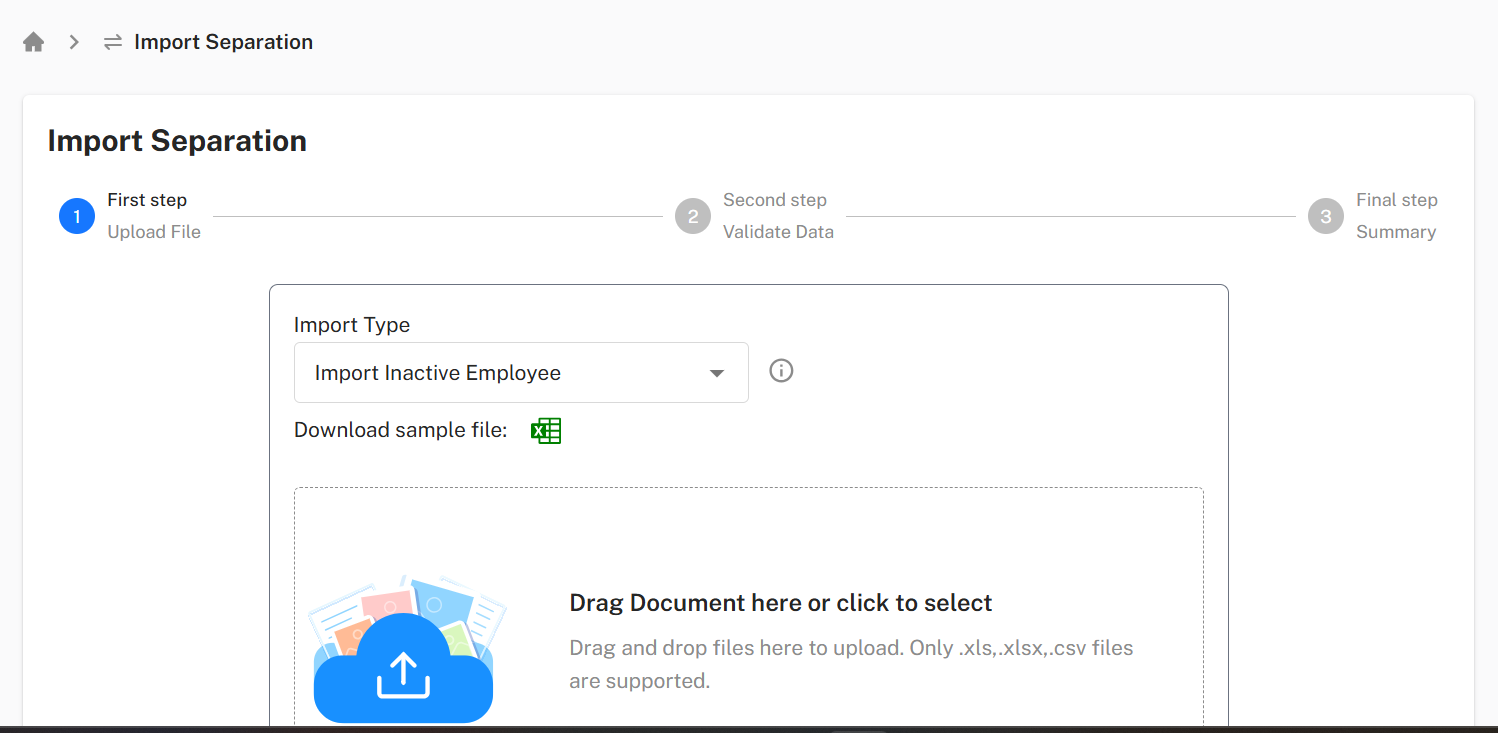
Import Separation
Redirects to the Import Separation Page.
Steps:
- Download the sample Excel template.
- Fill in mandatory and optional fields.
- Upload the file (drag & drop or select).
- Click Next Step → validate data.
- Click Next Step → finalize import.
- Success message appears: Data imported successfully.
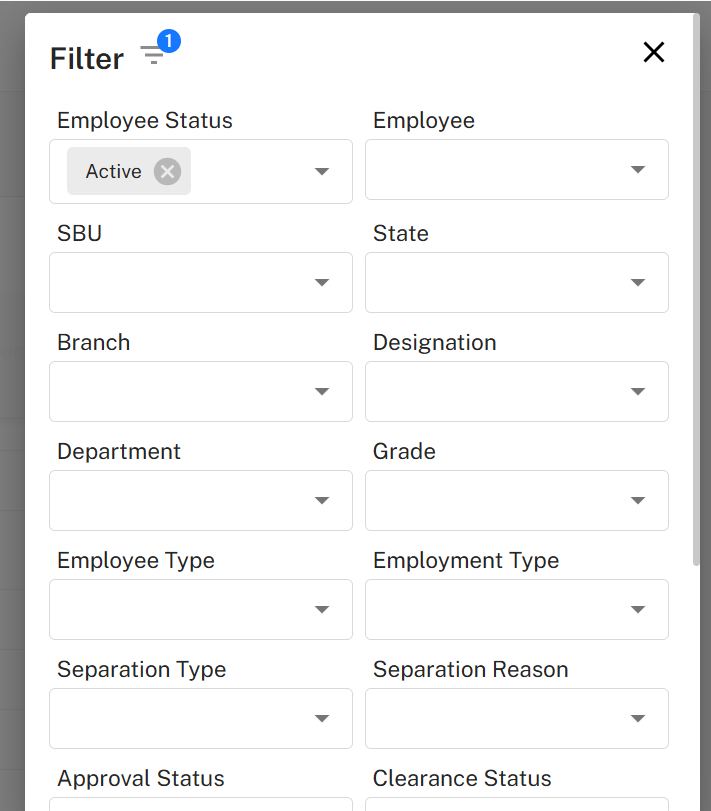
Filter Option
Purpose: Refine search results in the list.
Filter Fields:
- Employee Status
- Employee
- SBU
- State
- Branch
- Designation
- Department
- Grade
- Employee Type
- Employment Type
- Separation Type
- Separation Reason
- Approval Status
- Clearance Status
- Exit Interview Status
- Separation Status
- From Date
- To Date
Popup Buttons: Reset | Search | (Close)
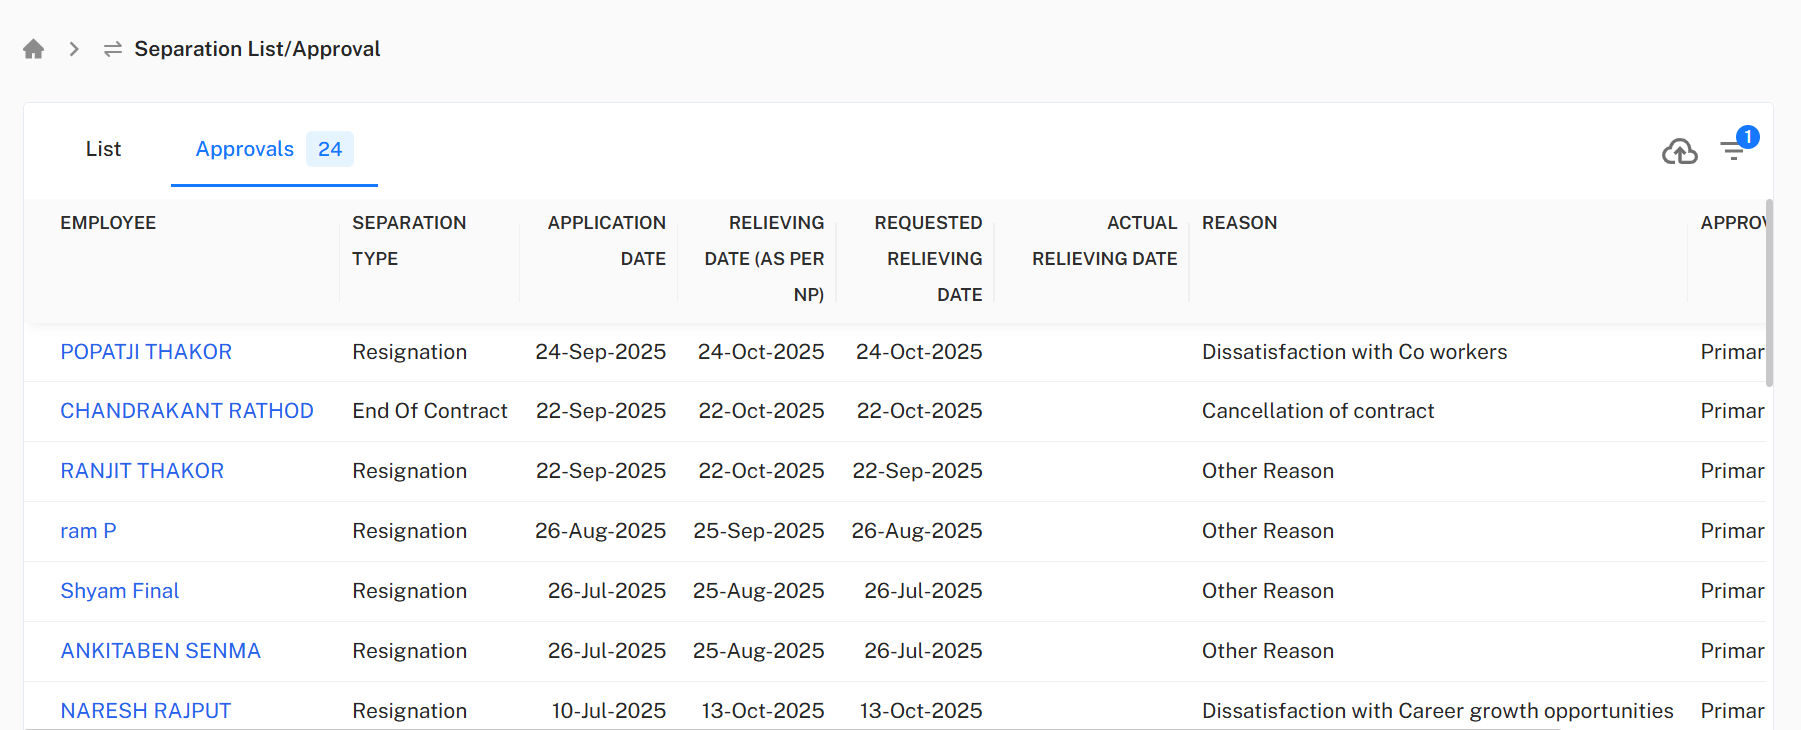
Step 2: Approval Tab
Navigation
Separation → Separation List/Approval → Approvals
Table Fields
- Employee
- Separation Type (Resignation, Termination, Retirement, End of Contract)
- Application Date
- Relieving Date (As Per NP)
- Requested Relieving Date
- Actual Relieving Date
- Reason
- Approval Status (Pending, Approved, Rejected)
Approve or Reject Separation
Click on an Employee Name in the table to open a Pending Actions Popup, which shows all pending actions of that employee.
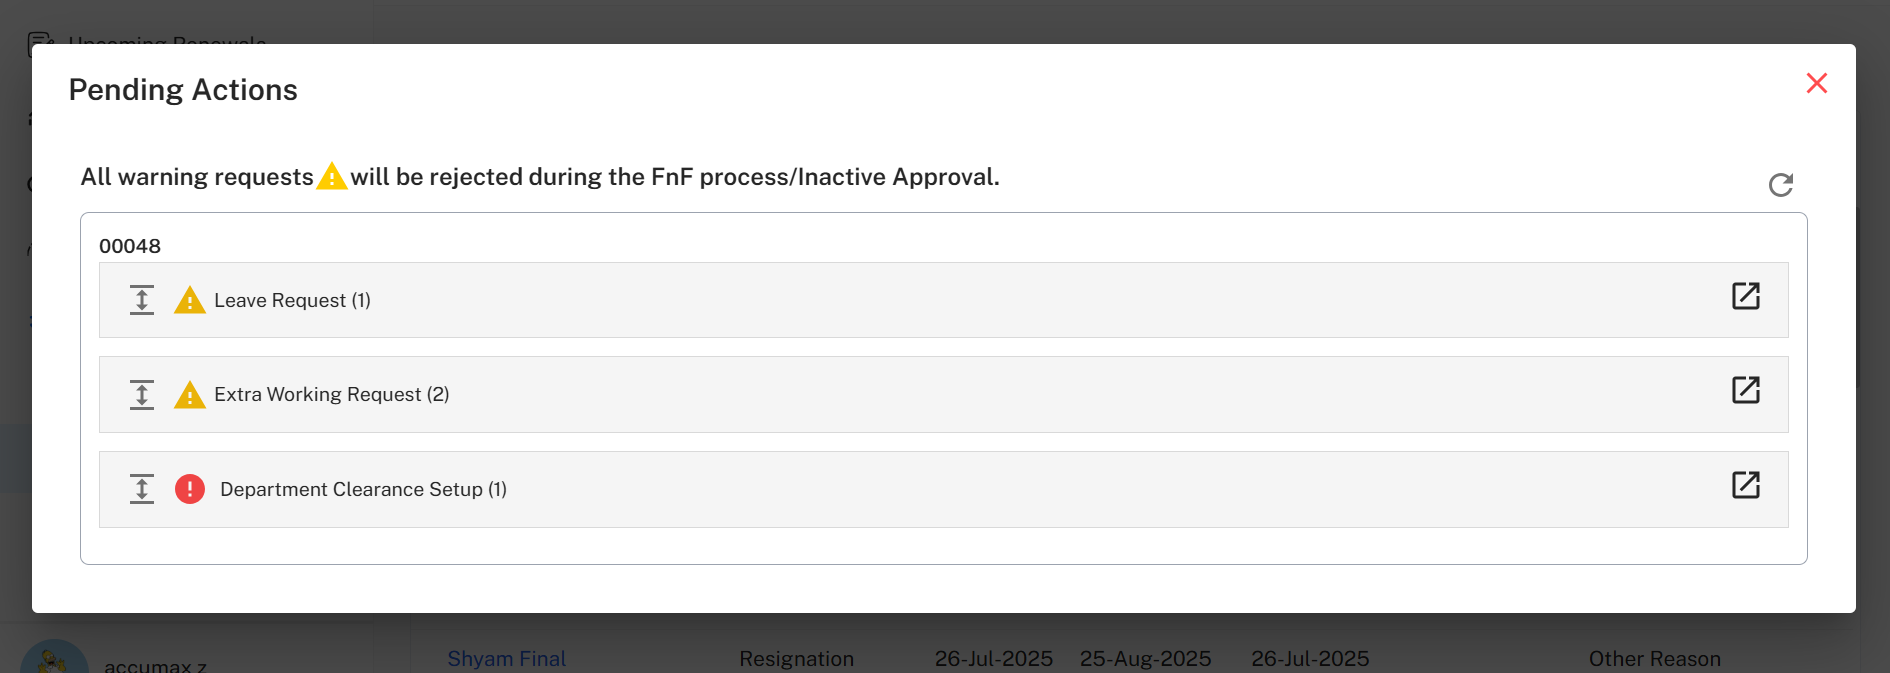
If you click the ** (close)** button on this popup, a new popup opens for final approval or rejection.
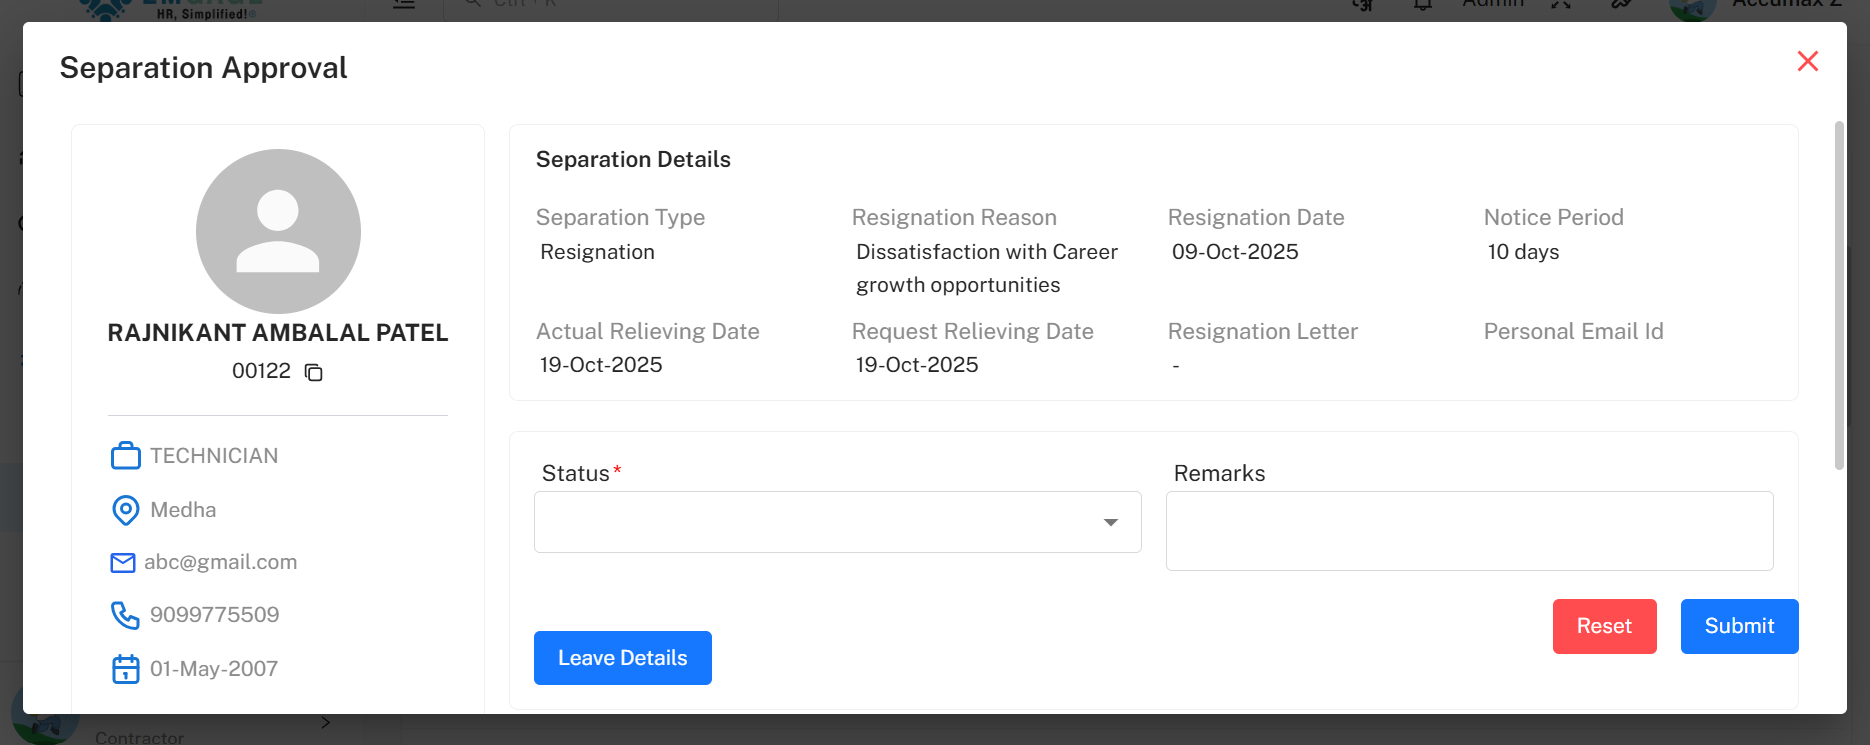
Approval/Reject Popup Details
Sections Displayed:
- Employee Details Box
- Separation Details Box
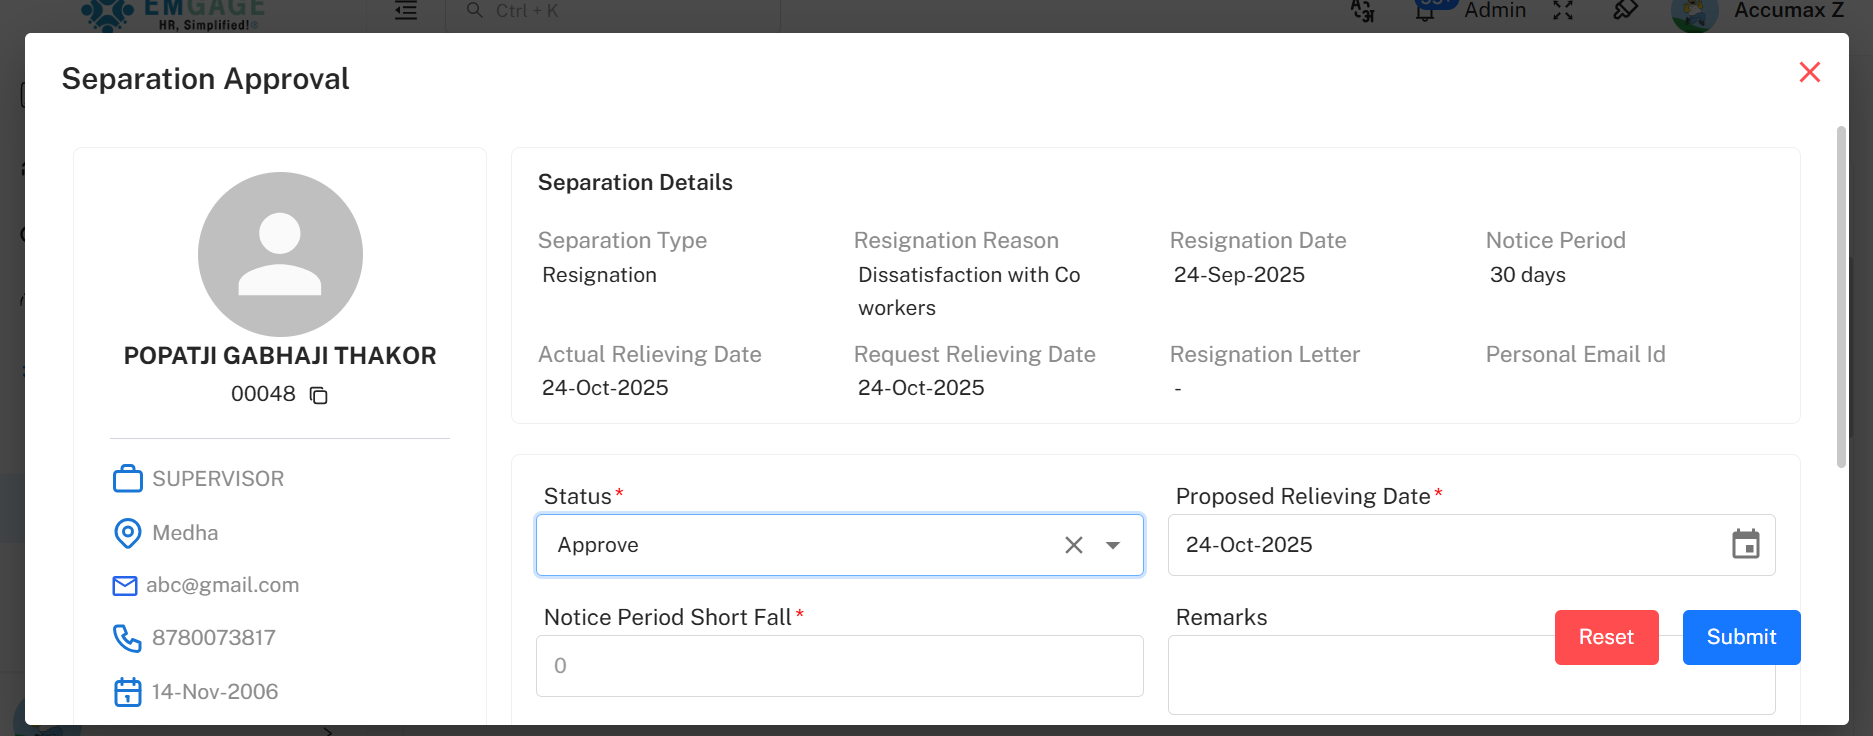
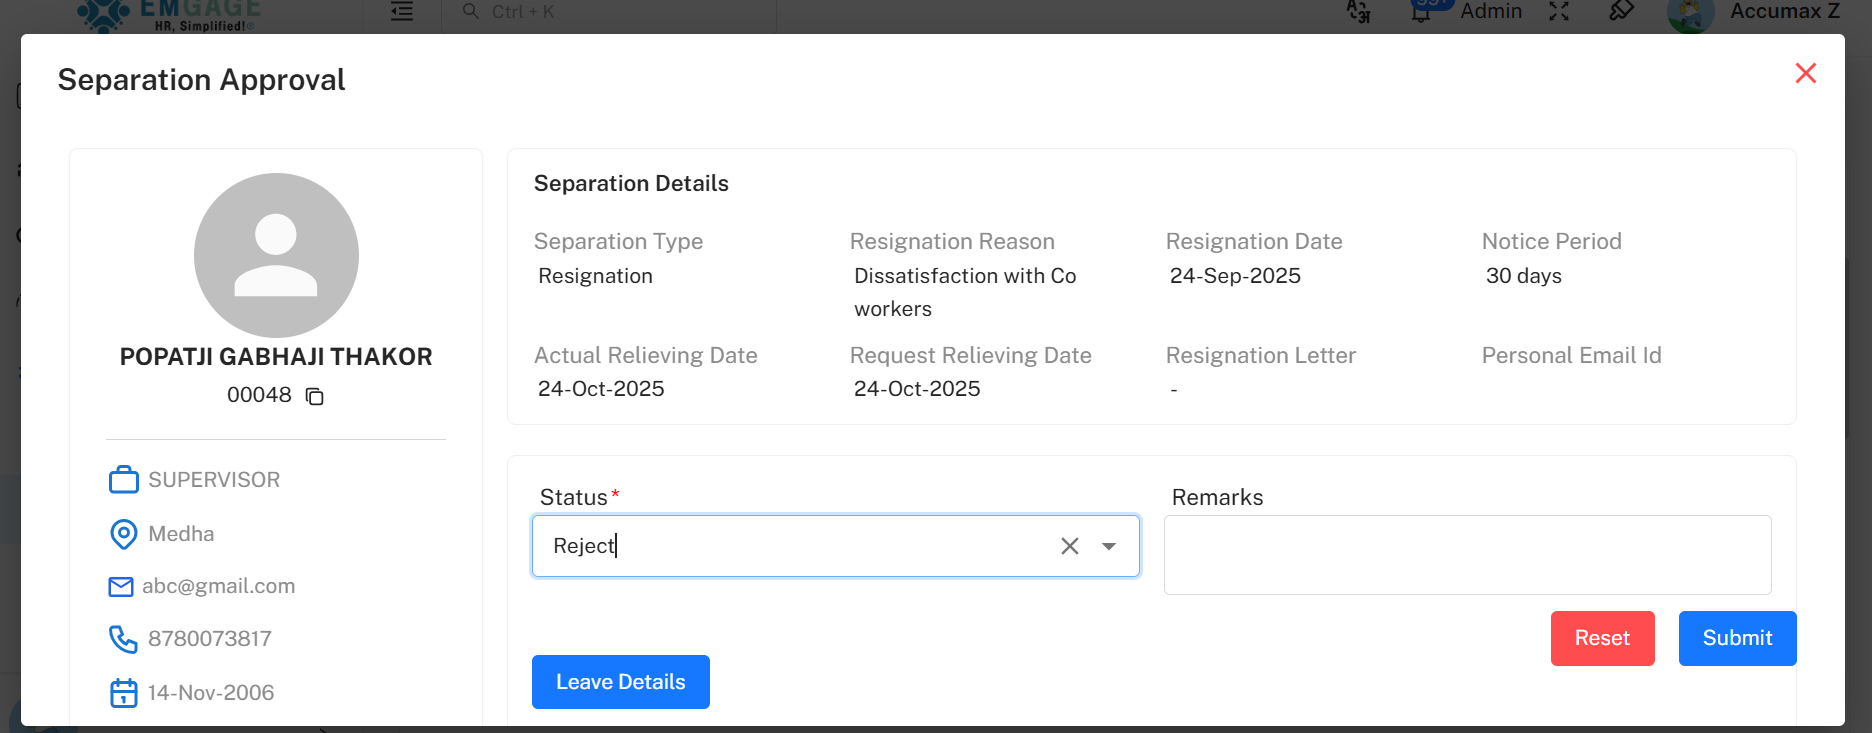
- Status* – Dropdown with two options:
- Approve → Displays additional fields:
- Proposed Relieving Date*
- Notice Period Shortfall*
- Remark
- Reject → Displays only Remark field (not mandatory).
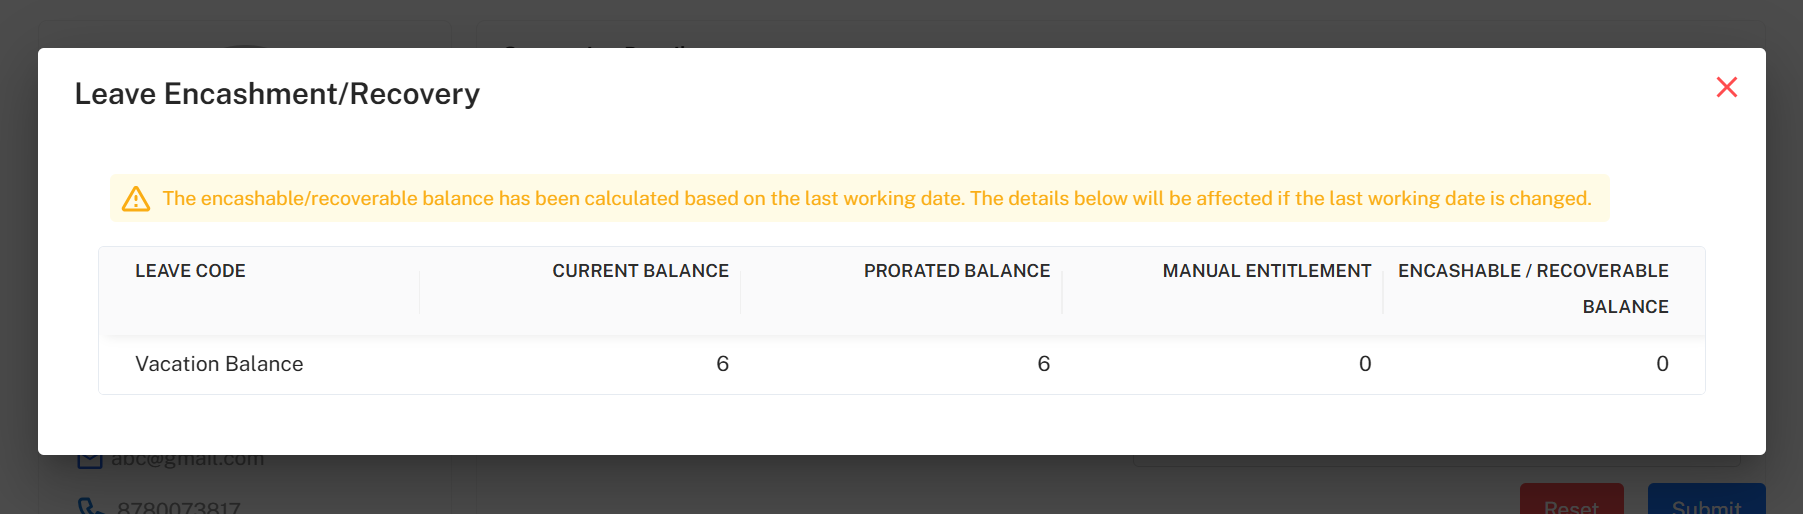
- Leave Details Button – Opens a popup showing the employee’s leave summary.
Popup Buttons:
- Reset – Clears entered data.
- Submit – Confirms the decision.
- ** (Close)** – Closes popup without saving.
Additional Buttons in Approval Tab
-
Import Separation – Same functionality as List tab.
-
Filter – Same as in List tab.
Example Workflow Summary
- Navigate to Separation → Separation List/Approval → List Tab.
- Review existing separation requests.
- Click + Request to initiate a new separation.
- If required, assign a Notice Period first.
- Complete the form based on separation type.
- Use Import Separation for bulk upload.
- Apply Filters to narrow search.
- Switch to Approval Tab for decision-making.
- Click employee name → review pending actions → finalize approval or rejection.
- Record all remarks for audit tracking.
Best Practices
- Always ensure each employee has an assigned Notice Period before separation.
- Use Filters to quickly locate pending or department-specific separations.
- Provide clear Remarks for approvals/rejections to maintain audit transparency.
- Review leave details before final approval.
- Validate all uploaded data during Import Separation to prevent errors.