My Ticket
Last Updated: October 22, 2025 Document Version: 1.0 Prepared for: Emgage HRMS Implementation Team
This module provides a centralized system for employees to raise support requests (tickets), which can then be categorized, assigned, prioritized, and tracked from creation to resolution.
Module Overview
Major features for help desk and ticketing:
- Ticket Creation: A simple form allows any user to create a new support ticket.
- Categorization & Assignment: Tickets can be assigned to predefined categories (e.g., "HEAD OFFICE - GENERAL ADMIN", "MEDHA - IT") and directly to a specific assignee.
- Priority Management: Set the urgency of each ticket by assigning a priority (High, Medium, or Low).
- Live Status Dashboard: A high-level dashboard provides an at-a-glance count of all tickets by their current status (e.g., New, In progress, Completed, On hold).
- Centralized Ticket List: A comprehensive grid view lists all tickets, showing key details like assignee, priority, status, and last update time.
- File Attachments: Users can upload documents, screenshots, or logs to provide more context for their support request.
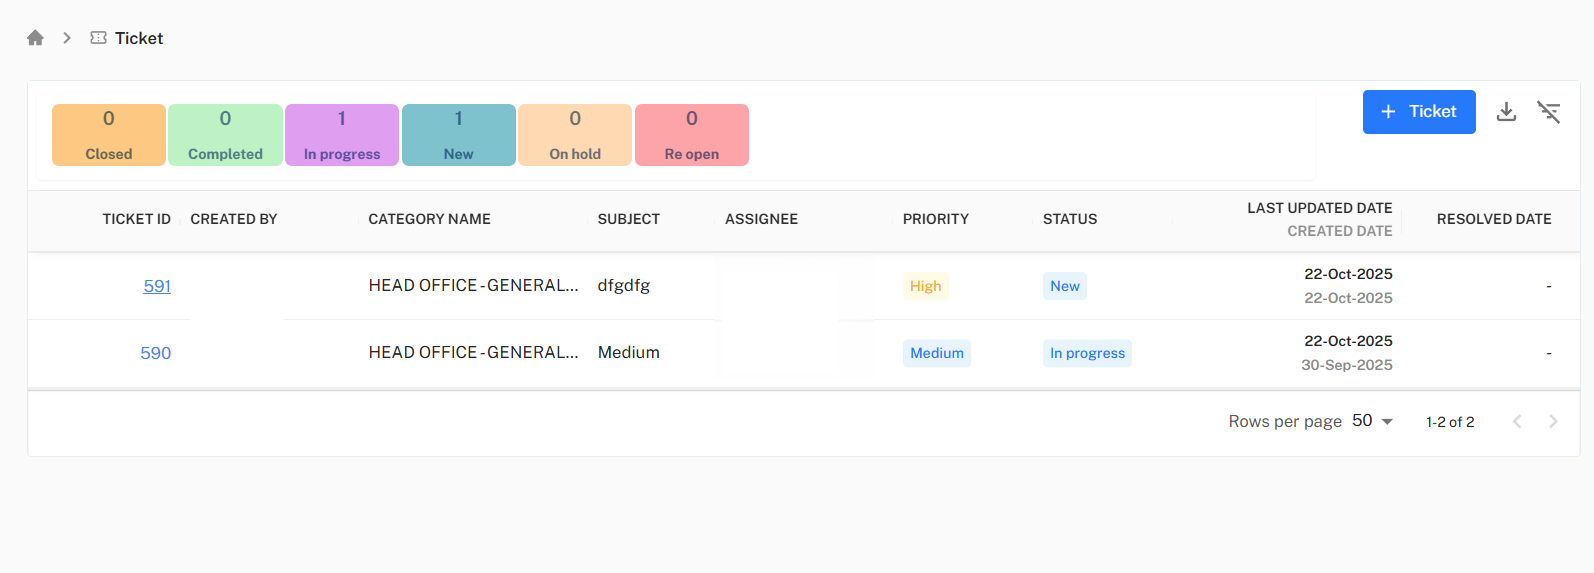
Ticket Status Dashboard
The top of the module features a dashboard that summarizes the entire ticket queue, allowing support staff and managers to quickly assess the workload.
- Status Counts: Displays the total number of tickets for each status:
Completed,In progress,New,On hold, andRe open. - Real-time Updates: These counts update automatically as new tickets are created or existing tickets have their status changed.
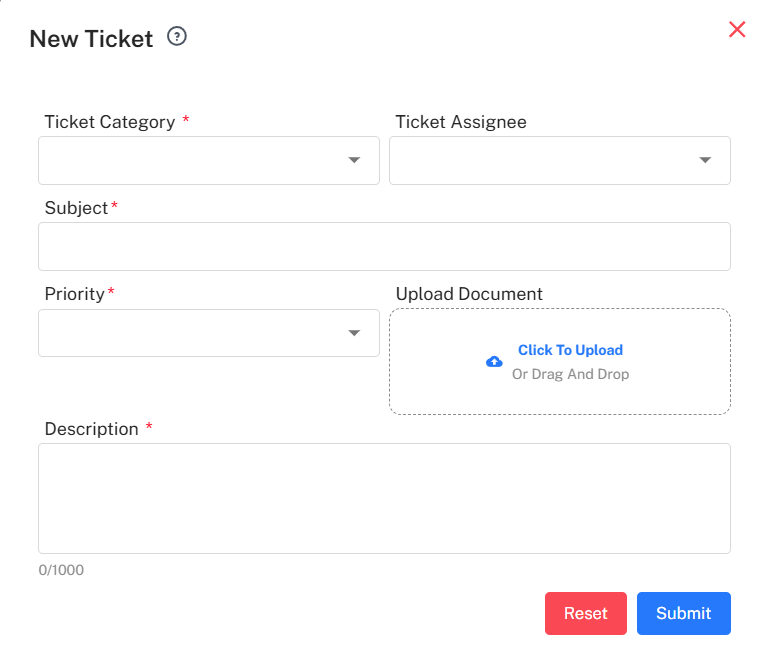
Creating a New Ticket
To create a new support request, click the + Ticket button. This opens the "New Ticket" form.
- Ticket Category: Select the department or type of issue from the dropdown menu.
- Ticket Assignee: (Optional) Choose a specific user to assign the ticket to.
- Subject: A brief, clear title for the ticket.
- Priority: Set the urgency of the request (High, Medium, or Low).
- Upload Document: Click or drag-and-drop files (like screenshots or error logs) to attach to the ticket.
- Description: Provide a detailed explanation of the issue or request.
After filling in the required fields, click Submit.
Ticket Management List
After a ticket is submitted, it appears in the main ticket list and the Status Dashboard is updated.
- Centralized Grid: This list shows all tickets and their details, including ID, Created By, Category, Subject, Assignee, Priority, and Status.
- Default Status: Newly created tickets are automatically given the "New" status.
- Tracking: Users can monitor this list to see updates to their ticket's status and assignee.
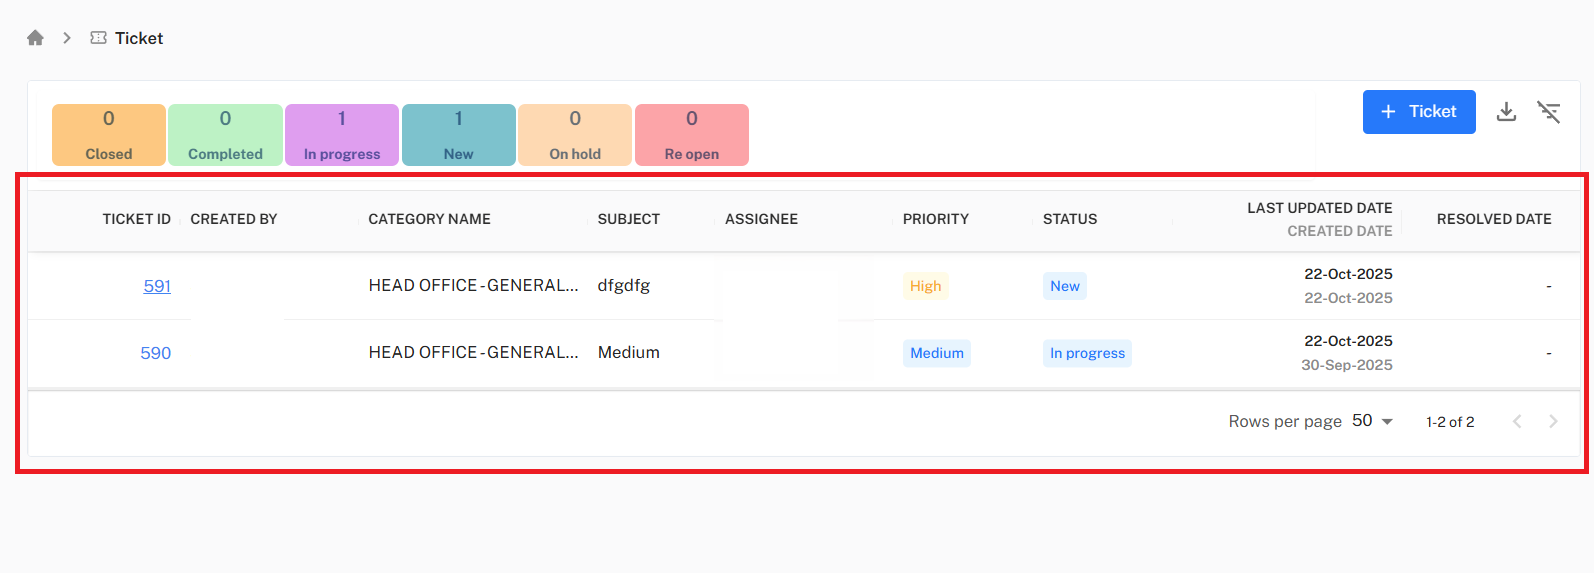
Step-by-Step Workflow:
- View Dashboard: A user can first check the main dashboard to see all open tickets.
- Create Ticket: Click the
+ Ticketbutton to open the "New Ticket" modal. - Fill Details: Complete the required fields, including
Ticket Category,Subject,Priority, andDescription. Optionally, add a specificTicket AssigneeandUpload Document. - Submit Request: Click the
Submitbutton. - Track Ticket: The request is successfully submitted, and the "New" count on the Status Dashboard increments by one. The new ticket now appears at the top of the Ticket Management List with the "New" status.